A Raspberry Pi LCD library for the widely used Hitachi HD44780 controller.

Project description


A Python 2/3 Raspberry PI Character LCD library for the Hitachi HD44780 controller.
Tested with the 20x4 LCD that is sold for example by adafruit.com or mikroshop.ch.
Also tested with a 16x2 LCD from mikroshop.ch and JHD162A.
This library is inspired by Adafruit Industries’ CharLCD library as well as by Arduino’s LiquidCrystal library.
No external dependencies (except the RPi.GPIO library, which comes preinstalled on Raspbian) are needed to use this library.
Features
Implemented
Simple to use API
Support for both 4 bit and 8 bit modes
Support for custom characters
Support for backlight control circuits
Python 2/3 compatible
Caching: Only write characters if they changed
No external dependencies
Wishlist
These things may get implemented in the future, depending on my free time and motivation:
I²C support
Wiring up Pi with LCD display
The following is the easiest way to wire up Pi with LCD display in 4-bit mode using default values used in the library.
HD44780 Pin Number |
Pi GPIO Pin Number (BOARD) |
Comments |
|---|---|---|
1 |
6 |
GND |
2 |
Depends on module |
* (See below) |
3 |
Depends on module |
* (See below) |
4 |
15 |
Register Select |
5 |
18 or 9 |
R/W. Can be directly attached to GND as well. |
6 |
16 |
Enable |
7-10 |
Not connected |
In 4-bit mode, we don’t connect them. |
11 |
21 |
D3 |
12 |
22 |
D2 |
13 |
23 |
D1 |
14 |
24 |
D0 |
15 |
Depends on module |
* (See below) |
16 |
14 |
GND |
* After wiring up the data pins, you have to connect the voltage input for controller and backlight, and set up the contrast circuit. As there are some differences regarding the hardware between different modules, please refer to the Adafruit tutorial to learn how to wire up these circuits.
Examples
Writing To Display
Basic text output with multiline control.
>>> from RPLCD import CharLCD
>>> lcd = CharLCD()
>>> lcd.write_string(u'Raspberry Pi HD44780')
>>> lcd.cursor_pos = (2, 0)
>>> lcd.write_string(u'http://github.com/\n\rdbrgn/RPLCD')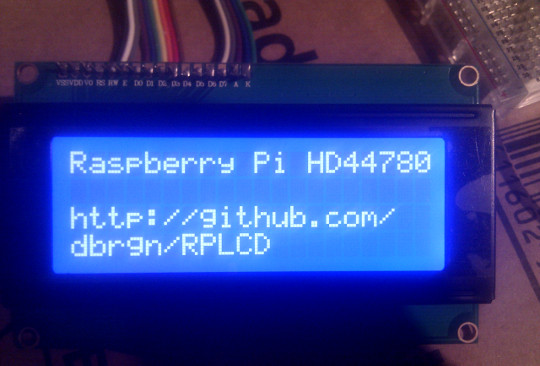
Context Managers
Unlike other uses of context managers, these implementations prepare the configuration before writing to the display, but don’t reset it after the block ends.
>>> from RPLCD import CharLCD, cleared, cursor
>>> lcd = CharLCD()
>>>
>>> with cleared(lcd):
>>>     lcd.write_string(u'LCD is cleared.')
>>>
>>> with cursor(lcd, 2, 0):
>>>     lcd.write_string(u'This is he 3rd line.')
Custom Characters
The HD44780 supports up to 8 user created characters. A character is defined by a 8x5 bitmap. The bitmap should be a tuple of 8 numbers, each representing a 5 pixel row. Each character is written to a specific location in CGRAM (numbers 0-7). To actually show a stored character on the display, use unichr() function in combination with the location number you specified previously (e.g. write_string(unichr(2)).
>>> from RPLCD import CharLCD, cleared, cursor
>>> lcd = CharLCD()
>>>
>>> smiley = (
...     0b00000,
...     0b01010,
...     0b01010,
...     0b00000,
...     0b10001,
...     0b10001,
...     0b01110,
...     0b00000,
... )
>>> lcd.create_char(0, smiley)
>>> lcd.write_string(unichr(0))
The following tool can help you to create your custom characters: https://omerk.github.io/lcdchargen/
Scrolling Text
I wrote a blogpost on how to implement scrolling text: https://blog.dbrgn.ch/2014/4/20/scrolling-text-with-rplcd/
To see the result, go to https://www.youtube.com/watch?v=49RkQeiVTGU.
Installing
From PyPI
You can install RPLCD directly from PyPI using pip:
$ sudo pip install RPLCD
Manual Installation
You can also install the library manually without pip. Either just copy the scripts to your working directory and import them, or download the repository and run python setup.py install to install it into your Python package directory.
API
Init, Setup, Teardown
import RPi.GPIO as GPIO
from RPLCD import CharLCD, BacklightMode

# Initialize display. All values have default values and are therefore
# optional.
lcd = CharLCD(pin_rs=15, pin_rw=18, pin_e=16, pins_data=[21, 22, 23, 24],
              numbering_mode=GPIO.BOARD,
              cols=20, rows=4, dotsize=8,
              auto_linebreaks=True,
              pin_backlight=None, backlight_enabled=True,
              backlight_mode=BacklightMode.active_low)

...

# If desired, reset the GPIO configuration and optionally clear the screen.
# Note that this can lead to undesired effects on the LCD, because the GPIO
# pins are not configured as input or output anymore.
lcd.close(clear=True)
Properties
display_enabled -> True / False
cursor_pos -> (row, col)
text_align_mode -> Alignment.left / Alignment.right
write_shift_mode -> ShiftMode.cursor / ShiftMode.display
cursor_mode -> CursorMode.hide / CursorMode.line / CursorMode.blink
backlight_enabled -> True / False
High Level Functions
write_string(value): Write the specified unicode string to the display. You can use newline (\n) and carriage return (\r) characters to control line breaks.
clear(): Overwrite display with blank characters and reset cursor position.
home(): Set cursor to initial position and reset any shifting.
shift_display(amount): Shift the display. Use negative amounts to shift left and positive amounts to shift right.
create_char(location, bitmap): Write a new character into the CGRAM at the specified location (0-7). See the examples section for more information.
Mid Level Functions
command(value): Send a raw command to the LCD.
write(value): Write a raw byte to the LCD.
Context Managers
cursor(lcd, row, col): Control the cursor position before entering the block.
cleared(lcd): Clear the display before entering the block.
Writing Special Characters
You might find that some characters like umlauts aren’t written correctly to the display. This is because the LCDs usually don’t use ASCII, ISO-8859-1 or any other standard encoding.
There is a script in this project though that writes the entire character map between 0 and 255 to the display. Simply run it as root (so you have permissions to access /dev/mem) and pass it the number of rows and cols in your LCD:
$ sudo python show_charmap.py 2 16
Confirm each page with the enter key. Try to find the position of your desired character using the console output. On my display for example, the “ü” character is at position 129 (in contrast to ISO-8859-1 or UTF-8, which use 252).
Now you can simply create a unicode character from the bit value and write it to the LCD. On Python 2:
>>> u'Z%srich is a city in Switzerland.' % unichr(129)
u'Z\x81rich is a city in Switzerland.'
And on Python 3, where strings are unicode by default:
>>> 'Z%srich is a city in Switzerland.' % chr(129)
'Z\x81rich is a city in Switzerland.'
In case you need a character that is not included in the default device character map, there is a possibility to create custom characters and write them into the HD44780 CGRAM. For more information, see the “Custom Characters” section in the “Examples” chapter.
Adding Backlight Control
By setting the pin_backlight parameter in the CharLCD constructor, you can control a backlight circuit.
First of all, you need to build an external circuit to control the backlight, most LCD modules don’t support it directly. You could do this for example by using a transistor and a pull-up resistor. Then connect the transistor to a GPIO pin and configure that pin using the pin_backlight parameter in the constructor. If you use an active high circuit instead of active low, you can change that behavior by setting the backlight_mode to either BacklightMode.active_high. Now you can toggle the backlight_enabled property.
Testing
To test your 20x4 display, please run the test_20x4.py script and confirm/verify each step with the enter key. If you don’t use the standard wiring, make sure to add your pin numbers to the CharLCD constructor in test_20x4.py.
To test a 16x2 display, procede as explained above, but use the test_16x2.py script instead.
Coding Guidelines
PEP8 via flake8 with max-line-width set to 99 and E126-E128,C901 ignored:
flake8 --max-line-length=99 --ignore=E126,E127,E128,C901 RPLCD/lcd.py
Resources
TC2004A-01 Data Sheet: http://www.adafruit.com/datasheets/TC2004A-01.pdf
HD44780U Data Sheet: http://www.adafruit.com/datasheets/HD44780.pdf
License
This code is licensed under the MIT license, see the LICENSE file or tldrlegal for more information.
The module RPLCD/enum.py is (c) 2004-2013 by Barry Warsaw. It was distributed as part of the flufl.enum package under the LGPL License version 3 or later.
Release history Release notifications | RSS feed


Download files
Download the file for your platform. If you're not sure which to choose, learn more about installing packages.
Source Distribution
Built Distribution
Hashes for RPLCD-0.4.0-py2.py3-none-any.whl
| Algorithm | Hash digest | |
|---|---|---|
| SHA256 | 8f5e1e1601c86c1d18562a99d5af77fa4e8ac8a97806e776e7ad09cccf00ace9 |
|
| MD5 | 10de1f55a681ee9265b430971a6996ff |
|
| BLAKE2b-256 | 40dfdb8d392a51975b738ffac833b30a37ece81930754bcd2660e26a5b65c5c3 |


