Pipelines

Project description
Pipelines
Pipelines is a simple tool with a web UI to manage running tasks. It supports running tasks manually through a Web UI or automatically via webhooks.
Pipelines is composed of three components:
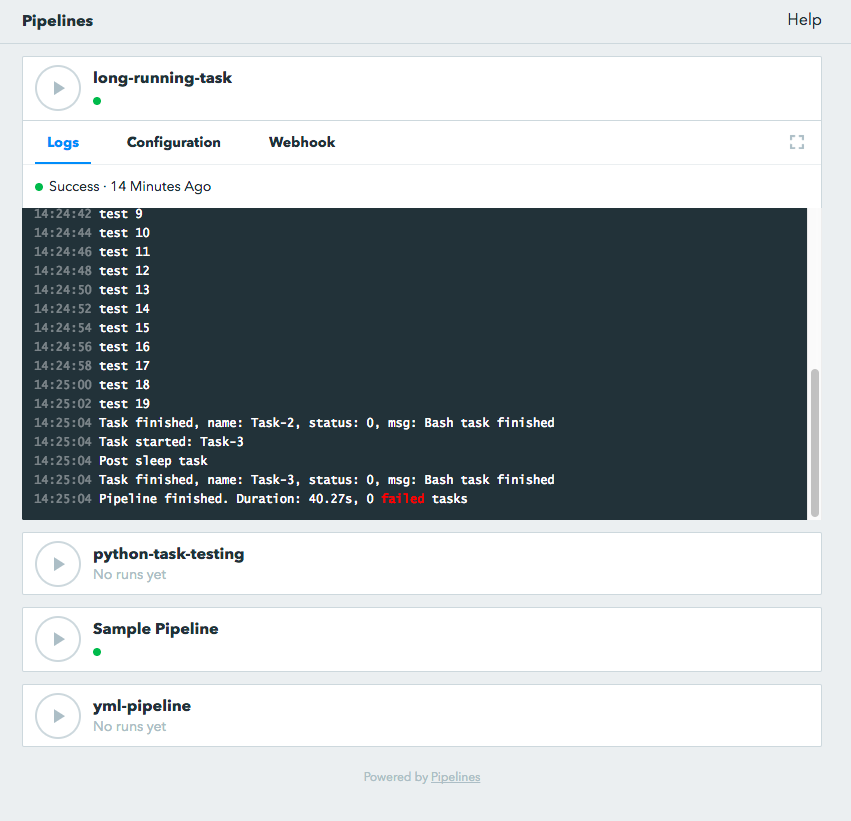
Web UI : User interface that allows users to run tasks, inspect logs and show the task details. It also support username/password authentication.
Pipelines API : This is the backend for the Web UI and webh
Pipelines library : This component includes core logic for running pipelies such as reading task definitions, handling logging and running the pipelines.
Pipelines is primarily developed to run on Linux / MacOS. Windows support is not available at the moment.
Installation
Requirements:
python 2.7 (other versions not tested)
pip
Base install
pip install pipelinesOr get the latest dev version from Github and run pip install . from within the cloned repo. Or run pip directly from git pip install git+git://github.com/Wiredcraft/pipelines@dev.
Configuration
Pipelines runs solely on files. No database is currently required. All the pipelines, the logs of each run and various temporary files are stored in the workspace.
The workspace is a folder that needs to be specified when running pipelines.
mkdir ~/pipelines_workspaceDrop your pipelines files (see format below) directly at the root of this folder.
Run standalone
Start the API with the following:
pipelines server --workspace ~/pipelines_workspace --username admin --password adminYou may want to specify a different binding IP address (default: 127.0.0.1) or different port (defaut: 8888). Refer to the pipelines --help for additional parameters.
You can now access pipelines at http://localhost:8888
Run as a daemon
Create a dedicated user to run pipelines
# Create a pipelines user
useradd -m -d /var/lib/pipelines -s /bin/false pipelines

# Create the workspace folder (optional)
mkdir /var/lib/pipelines/workspace
chown -R pipelines. /var/lib/pipelines

# Create a SSH key pair (optional)
sudo -u pipelines ssh-keygen
You may want to rely on supervisord to run the API.
# Ubuntu / Debian
apt-get install supervisor

# CentOS / RedHat (to confirm)
yum install supervisord
Copy and adapt de config file from etc/supervisor/pipelines.conf to /etc/supervisor.
# Update and reload supervisord
supervisorctl reread
supervisorctl update
supervisorctl start pipelines
Access the web interface at http://localhost:8888
Additionaly you may want to use nginx as reverse proxy as well. See sample config from etc/nginx.
Authentication
Static authentication
You can define a static admin user by specifying the following options when running pipelines:
--username ADMIN_USER
--password ADMIN_PASS
Github Oauth
You can add oauth support from Github to allow teams to access pipelines. You will need to set it by using environment variables for the Oauth Apps, and the --github-auth to limit teams access.
GH_OAUTH_KEY=my_oauth_app_key \
GH_OAUTH_SECRET=my_super_secret \
pipelines server [--options] --github-auth=MY_ORG/MY_TEAM
You can create Oauth Key/Secret in Github Oauth Applications
Note: If you use Github Oauth, you will not be able to use static authentication.
Pipelines file format
Pipeline definition file uses YAML syntax. A few examples below. Pipelines files are meant to be put at the root of your workspace.
Simple example
This is a very basic pipeline definition. Save it in your workspace within a .yaml file (e.g. WORKSPACE/example-pipeline.yaml). It does … nothing really useful TBH.
---
# Pipeline definitions are standard yaml and you can include comments inside

# Variables are exposed to all actions through {{ varname }} syntax.
vars:
    code_branch: dev

# Triggers define the automated ways to run the task. In addition to manual execution
# through the UI, only webhook is supported for now.
triggers:
    - type: webhook

# Actions are the steps that are run for this pipeline. The default action plugin is bash,
# but you can use others by defining the "type" field.
actions:
    - 'echo "Starting task for {{ code_branch }}"'
    - name: 'My custom name step'
      type: bash
      cmd: "echo 'less compact way to define actions'"
    - 'ls -la /tmp'
Vars
The vars section of the pipeline definition defines variables that will then be available in any of the actions.
vars:
    my_var: something

actions:
    - echo {{ my_var }}
You can then use the variables as seen above.
Note:
You may have to quote “ your vars to respect the YAML format.
Prompts
You can prompt users to manually input fields when they run the pipeine through the web-UI. To do this add a prompt section to your pipeline definition. The prompt fields will override the variables from the vars section.
vars:
    # This is the default value when triggered and no prompt is filled (e.g. via webhook)
    my_var: default_no_prompt

prompt:
    # This is the default value when triggered via the web UI
    my_var: default_with_prompt

actions:
    # This will display:
    #    "default_no_prompt" when call via webhook
    #    "default_with_prompt" when call via UI but keeping the default
    #    "other" when call via UI and "other" is inputted by the user
    - echo {{ my_var }}
Actions
Default actions use the bash plugin and will execute command as if they were shell commands.
Other actions can be used by specifying another type. Supported types currently are:
bash: run bash command.
python: write inline script or run python script inside a virtualenv.
slack: send message to Slack.
bash
See example above.
python
The python plugin allows to run python scripts or inline python code.
actions:
  - type: python
    script: |
      import json
      a = {'test': 'value', 'array': [1,2,3]}
      print json.dumps(a, indent=2)
  - type: python
    virtualenv:  /opt/venvs/my_env
    file: '/tmp/some_script.py'
Explanation of the fields:
script: inline python code to be run against the python interpreter.
file: run a python script.
virtualenv: run the python code (inline or file) inside a virtualenv.
Note:
The path of either virtualenv folder or file need to exist and be on the server. It is currently set relatively to the CWD where the Pipelines api / UI is running from.
slack
The slack plugin allows sending messages over to Slack (e.g. pipelines execution status).
vars:
    slack_webhook: https://hooks.slack.com/services/SOME/RANDOM/StrIng
    name: some_name

actions:
    - type: slack
      message: 'Deployment finished for project {{ name }}.'
      always_run: true
Explanation of fields:
type: tells Pipelines to execute the action through the slack plugin.
always_run: ensure the action is run all the time - even if a former action failed.
message: is the message to send to Slack.
Note:
The slack plugin require a slack_webhook vars defined in the vars section of the pipeline.
Slack Hooks URL are defined via the Incoming WebHooks app (Slack API details here).
Triggers
Webhooks
If you want to run your pipeline by triggering it through a webhook you can enable it in the triggers section.
triggers:
    - type: webhook
If you open the web-UI you can see the webhook URL that was generated for this pipeline in the “Webhook” tab. You can for example configure GitHub repository to call this url after every commit.
You can access the content of the webhook content in the actions in the webhook_content variable; e.g. echo {{ webhook_content.commit_id }}
Note:
You need to send the message via POST as application/json Content-Type.
Documentation is coming to explain how to use the content of the data sent through the hook.
Dirty line by line setup
TODO: Make a real setup script / one-liner script … and not Debian only …
apt-get update
apt-get upgrade
apt-get install python-pip git
pip install virtualenv
virtualenv pipelines
source pipelines/bin/activate
pip install pipelines
mkdir ~/pipelines_workspace
pipelines server --workspace ~/pipelines_workspace --username admin --password admin
Docker
Note: Not heavily tested.
docker run -d boratbot/pipelinesRoadmap
No definitive roadmap for the moment, mainly focusing on having a lean code base (heavy refactoring to come).
Among the possible features:
Improved web UI & features
Better webhook management
Better management of the tasks
CLI
Toolbar
Improved Auth
etc.
Release history Release notifications | RSS feed


Download files
Download the file for your platform. If you're not sure which to choose, learn more about installing packages.


