Python library for Uploadcare.com


Project description

Package Docs • Uploadcare Docs • Upload API Reference • REST API Reference • URL API Reference • Website
Python API client for Uploadcare


Build file handling in minutes. Upload or accept user-generated content, store, transform, optimize, and deliver images, videos, and documents to billions of users.
Description
This library consists of the APIs interface and a couple of Django goodies, 100% covering Upload, REST and URL Uploadcare APIs.
- Upload files from anywhere via API or ready-made File Uploader
- Manage stored files and perform various actions and conversions with them
- Optimize and transform images on the fly
- Deliver files fast and secure
Documentation
Detailed specification of this library is available on RTD.
Please note that this package uses Uploadcare API keys and is intended to be used in server-side code only.
Installation
In order to install pyuploadcare, run these command in CLI:
pip install pyuploadcare
To use in Django project install with extra dependencies:
pip install pyuploadcare[django]
Requirements
- Python 3.8, 3.9, 3.10, 3.11, 3.12
To use pyuploadcare with Python 3.6 or 3.7 please install pyuploadcare < 5.0.
To use pyuploadcare with Python 2.7 please install pyuploadcare < 3.0.
Django compatibility:
| Py/Dj | 2.2 | 3.0 | 3.1 | 3.2 | 4.0 | 4.1 | 4.2 | 5.0 |
|---|---|---|---|---|---|---|---|---|
| 3.8 | X | X | X | X | X | X | X | |
| 3.9 | X | X | X | X | X | X | X | |
| 3.10 | X | X | X | X | X | |||
| 3.11 | X | X | X | |||||
| 3.12 | X | X |
Usage
After package installation, you’ll need API keys: public and secret. Get them in Uploadcare dashboard. If you don’t have an account yet, you can use demo keys, as in example. However, the files on demo account are regularly removed, so create an account as soon as Uploadcare catches your fancy.
In these examples we’re going to use the aforementioned demo keys.
Basic usage
Let’s start with the basics. Say, you want to upload a file:
from pyuploadcare import Uploadcare

uploadcare = Uploadcare(public_key="demopublickey", secret_key="demoprivatekey")
with open("sample-file.jpeg", "rb") as file_object:
    ucare_file = uploadcare.upload(file_object)
And your file is now uploaded to the Uploadcare CDN. But how do you access it from the web? It’s really simple:
print(ucare_file.cdn_url) # file URL, e.g.: https://ucarecdn.com/640fe4b7-7352-42ca-8d87-0e4387957157/
And what about information about the file?
from pprint import pprint

pprint(ucare_file.info)

# {'appdata': None,
#  'content_info': {'image': {'color_mode': <ColorMode.RGB: 'RGB'>,
#                             'datetime_original': datetime.datetime(2023, 3, 10, 16, 23, 15),
#                             'dpi': (72, 72),
#                             'format': 'JPEG',
#                             'geo_location': None,
#                             'height': 4516,
#                             'orientation': 1,
#                             'sequence': False,
#                             'width': 3011},
#                   'mime': {'mime': 'image/jpeg',
#                            'subtype': 'jpeg',
#                            'type': 'image'},
#                   'video': None},
#  'datetime_removed': None,
#  'datetime_stored': datetime.datetime(2024, 2, 16, 14, 44, 29, 637342, tzinfo=TzInfo(UTC)),
#  'datetime_uploaded': datetime.datetime(2024, 2, 16, 14, 44, 29, 395043, tzinfo=TzInfo(UTC)),
#  'is_image': True,
#  'is_ready': True,
#  'metadata': {},
#  'mime_type': 'image/jpeg',
#  'original_file_url': 'https://ucarecdn.com/640fe4b7-7352-42ca-8d87-0e4387957157/samplefile.jpeg',
#  'original_filename': 'sample-file.jpeg',
#  'size': 3518420,
#  'source': None,
#  'url': 'https://api.uploadcare.com/files/640fe4b7-7352-42ca-8d87-0e4387957157/',
#  'uuid': UUID('640fe4b7-7352-42ca-8d87-0e4387957157'),
#  'variations': None}
A whole slew of different file operations are available. Do you want to crop your image, but don't want important information (faces, objects) to be cropped? You can do that with content-aware (“smart”) crop:
from pyuploadcare.transformations.image import ImageTransformation, ScaleCropMode

# These two function calls are equivalent
ucare_file.set_effects("scale_crop/512x512/smart/")
ucare_file.set_effects(ImageTransformation().scale_crop(512, 512, mode=ScaleCropMode.smart))

print(ucare_file.cdn_url)  # https://ucarecdn.com/640fe4b7-7352-42ca-8d87-0e4387957157/-/scale_crop/512x512/smart/
There’s a lot more to uncover. For more information please refer to the documentation.
Django integration
Let's add File Uploader to an existing Django project.
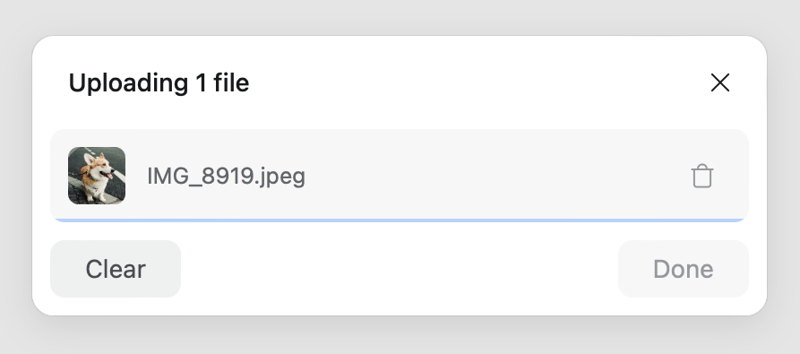
We will allow users to upload their images through a nice and modern UI within the standard Django admin or outside of it, and then display these images on the website and modify them using advanced Uploadcare CDN features.
Assume you have a Django project with gallery app.
Add pyuploadcare.dj into INSTALLED_APPS:
INSTALLED_APPS = (
    # ...
    "pyuploadcare.dj",
    "gallery",
)
Add API keys to your Django settings file:
UPLOADCARE = {
    "pub_key": "demopublickey",
    "secret": "demoprivatekey",
}
Uploadcare image field adding to your gallery/models.py is really simple. Like that:
from django.db import models

from pyuploadcare.dj.models import ImageField


class Photo(models.Model):
    title = models.CharField(max_length=255)
    photo = ImageField()
ImageField doesn’t require any arguments, file paths or whatever. It just works. That’s the point of it all. It looks nice in the admin interface as well:

Obviously, you would want to use Uploadcare field outside an admin. It’s going to work just as well, but, however, you have to remember to add {{ form.media }} in the <head> tag of your page:
{{ form.media }}

<form action="" method="post">
    {% csrf_token %}
    {{ form.as_p }}
    <input type="submit" value="Save"/>
</form>
This is a default Django form property which is going to render any scripts needed for the form to work, in our case — Uploadcare scripts.
After an image is uploaded, you can deliver it while transforming it on the fly:
{% for photo in photos %}
    <h2>{{ photo.title }}</h2>
    <img src="{{ photo.photo.cdn_url }}-/resize/400x300/-/effect/flip/-/effect/grayscale/">
{% endfor %}
(Refer to Uploadcare image processing docs for more information).
Testing
To run tests using Github Actions workflows, but locally, install the act utility, and then run it:
make test_with_github_actions
This runs the full suite of tests across Python and Django versions.
Demo app
We've developed a demo app that showcases most of the features. You can install pyuploadcare-example using Docker or without it. You can use it as a reference or even base your project on it.
Suggestions and questions
Release history Release notifications | RSS feed


Download files
Download the file for your platform. If you're not sure which to choose, learn more about installing packages.
Source Distribution
Built Distribution
Hashes for pyuploadcare-5.1.0-py3-none-any.whl
| Algorithm | Hash digest | |
|---|---|---|
| SHA256 | 9b351646c7d68368f7b487ecbde735def25fd69235e08afd1009c1c042c0d9e9 |
|
| MD5 | fdf4d8edc8daacd4846dd56931156a06 |
|
| BLAKE2b-256 | 121610834fc444281cfdc7d9ec3b09d99ea6bd52e24e5d25cade1bdf354e06ca |


