Astrophotography + raspberry pi HQ camera = AstroPitography


Project description
AstroPitography
Astrophotography + Raspberry Pi HQ camera = AstroPitography
Request Feature
NOTICE 3-Jan-2024:
I have been looking into upgrading this repository to use picamera2 in order to make it compatible with Raspberry OS Bullseye and later. This is proving to be a bit of a headache as the installation process is obtuse given the dependencies of picamera2 but more annoyingly is the incompatibility of picamera2 with virtual environments (even conda) which I am still trying to debug.
I will put this upgrade on hold for now and continue with feature development & importantly documentation; but I will add instructions on how to get AstroPitography working with Bullseye or later OSs.
I will push some more changes soon which are going to improve the code structure and to adapt the repository to follow development best practices including linting, format checking, automated testing etc... I apologise for the lack of progress over the last few months; time has been a major issue for me but I have enforced time in my evenings to devote to this project.
Table of Contents
- About AstroPitography
- Comprehensive Guide
- Getting Started
- Starting From Scratch
- Dependencies
- Roadmap
- Examples
About AstroPitography
Astrophotography is typically costly due to equipment like scopes, mounts, cameras, and accessories. Despite this, I've always enjoyed pushing the limits of more modest hardware to explore its potential. With the release of the £50 Raspberry Pi High Quality camera, I aimed to test its capabilities in astrophotography. While it can't surpass top-tier DSLRs or expensive ZWO cameras in performance, I wanted to explore its potential. To facilitate this, I developed a straightforward Python program that serves as a basic GUI for my telescope outings.
Combining the Raspberry Pi 3B+ with the HQ camera, I used a 1.25-inch to C adapter to position them in the telescope's eyepiece slot. Setting up the Raspberry Pi as a wireless access point, I connect to its network via VNC on my phone, providing a convenient way to interact with the GUI. Alternatively, a small Raspberry Pi screen or a regular monitor can also be used.
Initially, I used stellarmate with kstars, but I sought a simpler method to interface with the HQ camera. This is an early implementation of the program which currently has the following features:
- Control important settings of the camera:
- Brightness
- Contrast
- Saturation
- Sharpness
- Exposure (shutter speed in this instance)
- Time delay between images
- Show a live preview of the camera view in the main window; useful for making sure something is in frame.
- Ability to enlarge and shrink the live preview using GUI buttons.
- Ability to overlay a crosshair on the live preview, useful for alignment.
- Automatic plate solving using ESAs lost in space tetra3 algorithm.
- Ability to set Raspberry Pi time and data from within the GUI.
- Very useful for headless setups where WiFi cannot be accessed.
- Toggle greyscale imaging (useful if using colour filters) and auto white balance correction.
- Allows for capturing of single images, multiple images with time delay and long exposure imaging.
- When a picture is taken it is visible from the top menu.
- If it is a poor image it can be deleted from within the program.
- The default save location can be selected from within the program window; handy for saving to USB stick etc... especially for large RAW files.
- Timed video capturing.
- The image save format is
RAW, preferred overpngwhich processes the image.pngis used when showing the most recent image taken.- An option is provided to extract the RAW image information from the .jpg file and saved as a dng file using PiDNG.
Necessary Hardware
These are not endorsements or sponsors, just where I purchased them from
In theory any Raspberry Pi should work, along with the other various Raspberry Pi cameras.
Comprehensive Guide
If you are looking for a guide on how to setup your Raspberry Pi from scratch with everything explained then please visit the new comprehensive guide
Getting Started
Before installing the package, it is highly recommended that AstroPitography is used in a virtual environment due to the specific versions used for SciPy and numpy. We will use the virtualenv module instead of Python's built-in venv module, although both are completely viable options.
Start by installing the package and its wrapper using:
pip3 install virtualenv virtualenvwrapper
nano ~/.bashrc
Copy and paste the following into the /.bashrc file:
#Virtualenvwrapper settings:
export VIRTUALENVWRAPPER_PYTHON=/usr/bin/python3
export WORKON_HOME=$HOME/.virtualenvs
export VIRTUALENVWRAPPER_VIRTUALENV=~/.local/bin/virtualenv
source ~/.local/bin/virtualenvwrapper.sh
export VIRTUALENVWRAPPER_ENV_BIN_DIR=bin
Reload the file:
source ~/.bashrc
Create your virtual environment:
mkvirtualenv [NAME OF VENV]
To work inside your virtual environment:
workon [NAME OF VENV]
Install the package:
pip install astropitography
You're now read to start taking pictures and videos with your Raspberry Pi! To run the program, type:
astropitography
into your terminal on your Raspberry Pi. Editing your .bashrc can allow for the program to begin on startup. You can specify the image save location from the menu button at the top of the window.
To exit/deactivate your virtual environment when you are done, use the following:
deactivate
Note:
My Raspberry Pi's resolution was set to 1600 x 900, 16:9 which you may want to replicate when using the program. I plan to generalize the code for any resolution in the future.
Starting From Scratch
If you are new to using Raspberry Pi's, getting everything setup can seem a little daunting. See [this])() indepth guide on how to setup your Raspberry Pi for use with AstroPitography.
Roadmap
- More testing (when the skies finally improve here in rainy UK!)
- Allow for fractional variability in shutter speed (simple to implement)
- Improve features of video implementation.
- The ability to load camera presets for different objects (e.g. planetary, deep sky etc...) [In progress]
- Automatic image stacking capability. [In progress]
Contact
Adam Baskerville - @AdamBask - adamlukebaskerville@gmail.com
Daniel Opara - daniel.opara@tufts.edu
Project Link: https://github.com/adambaskerville/AstroPitography
Examples
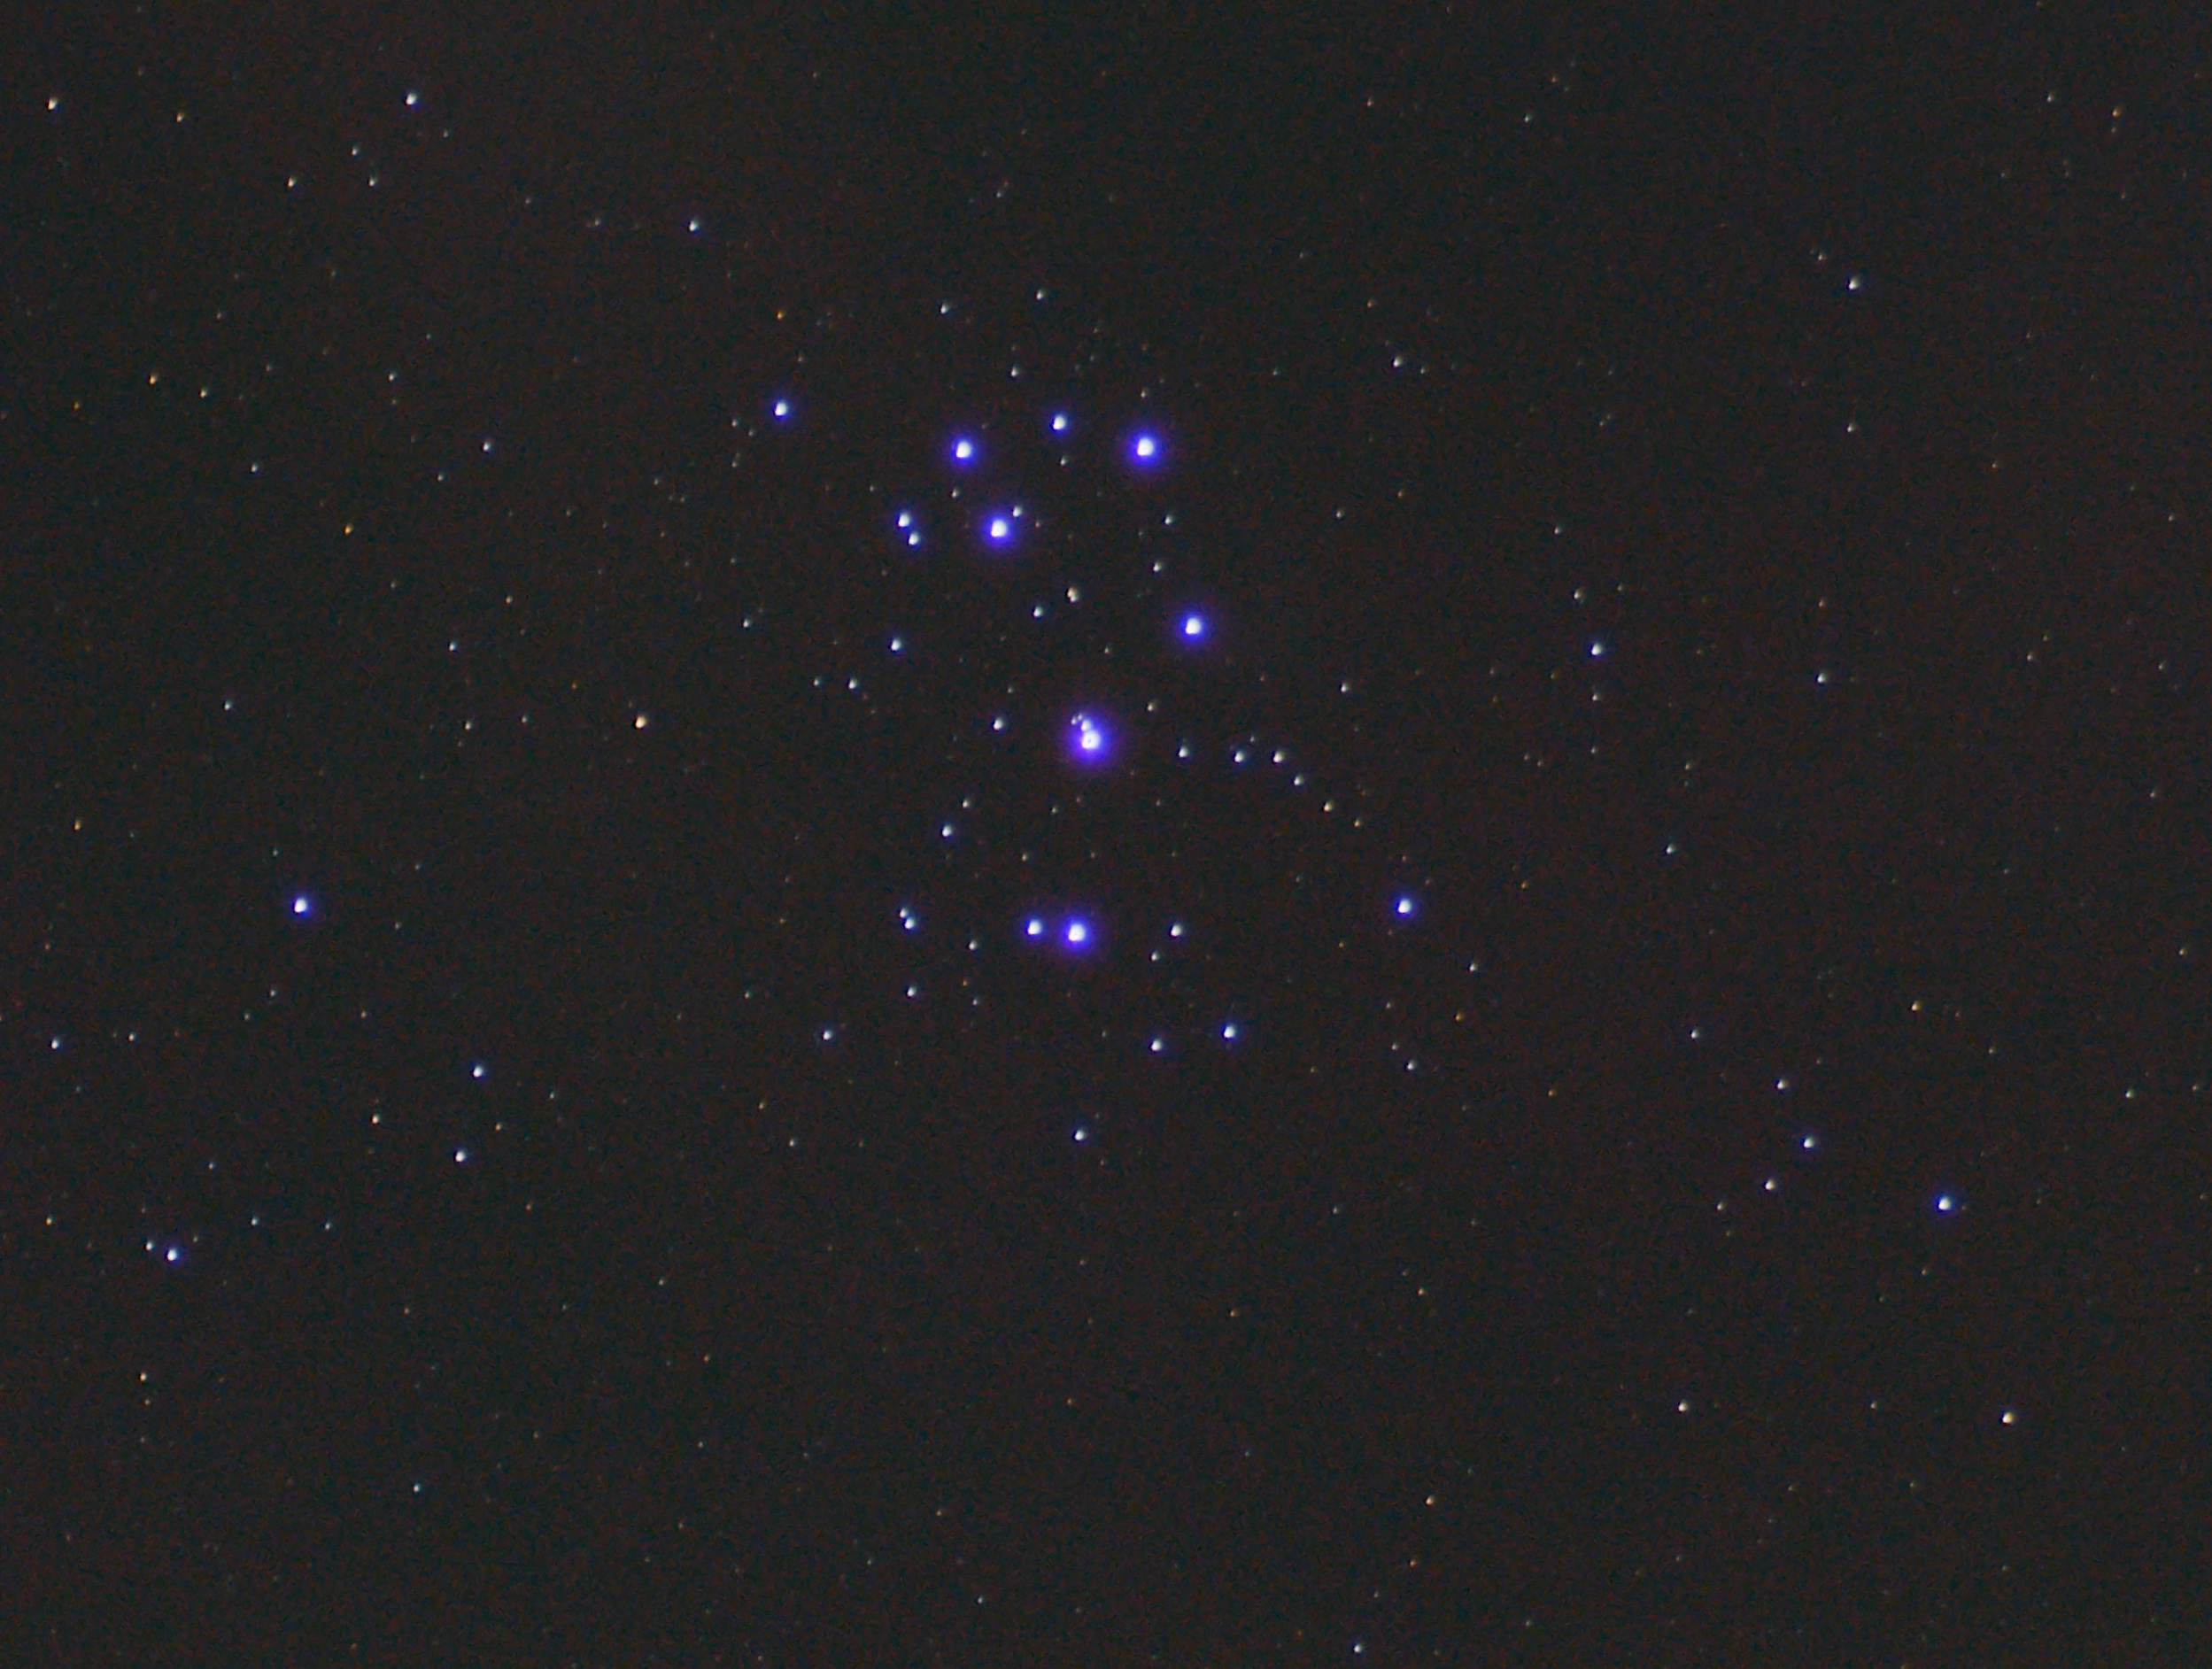
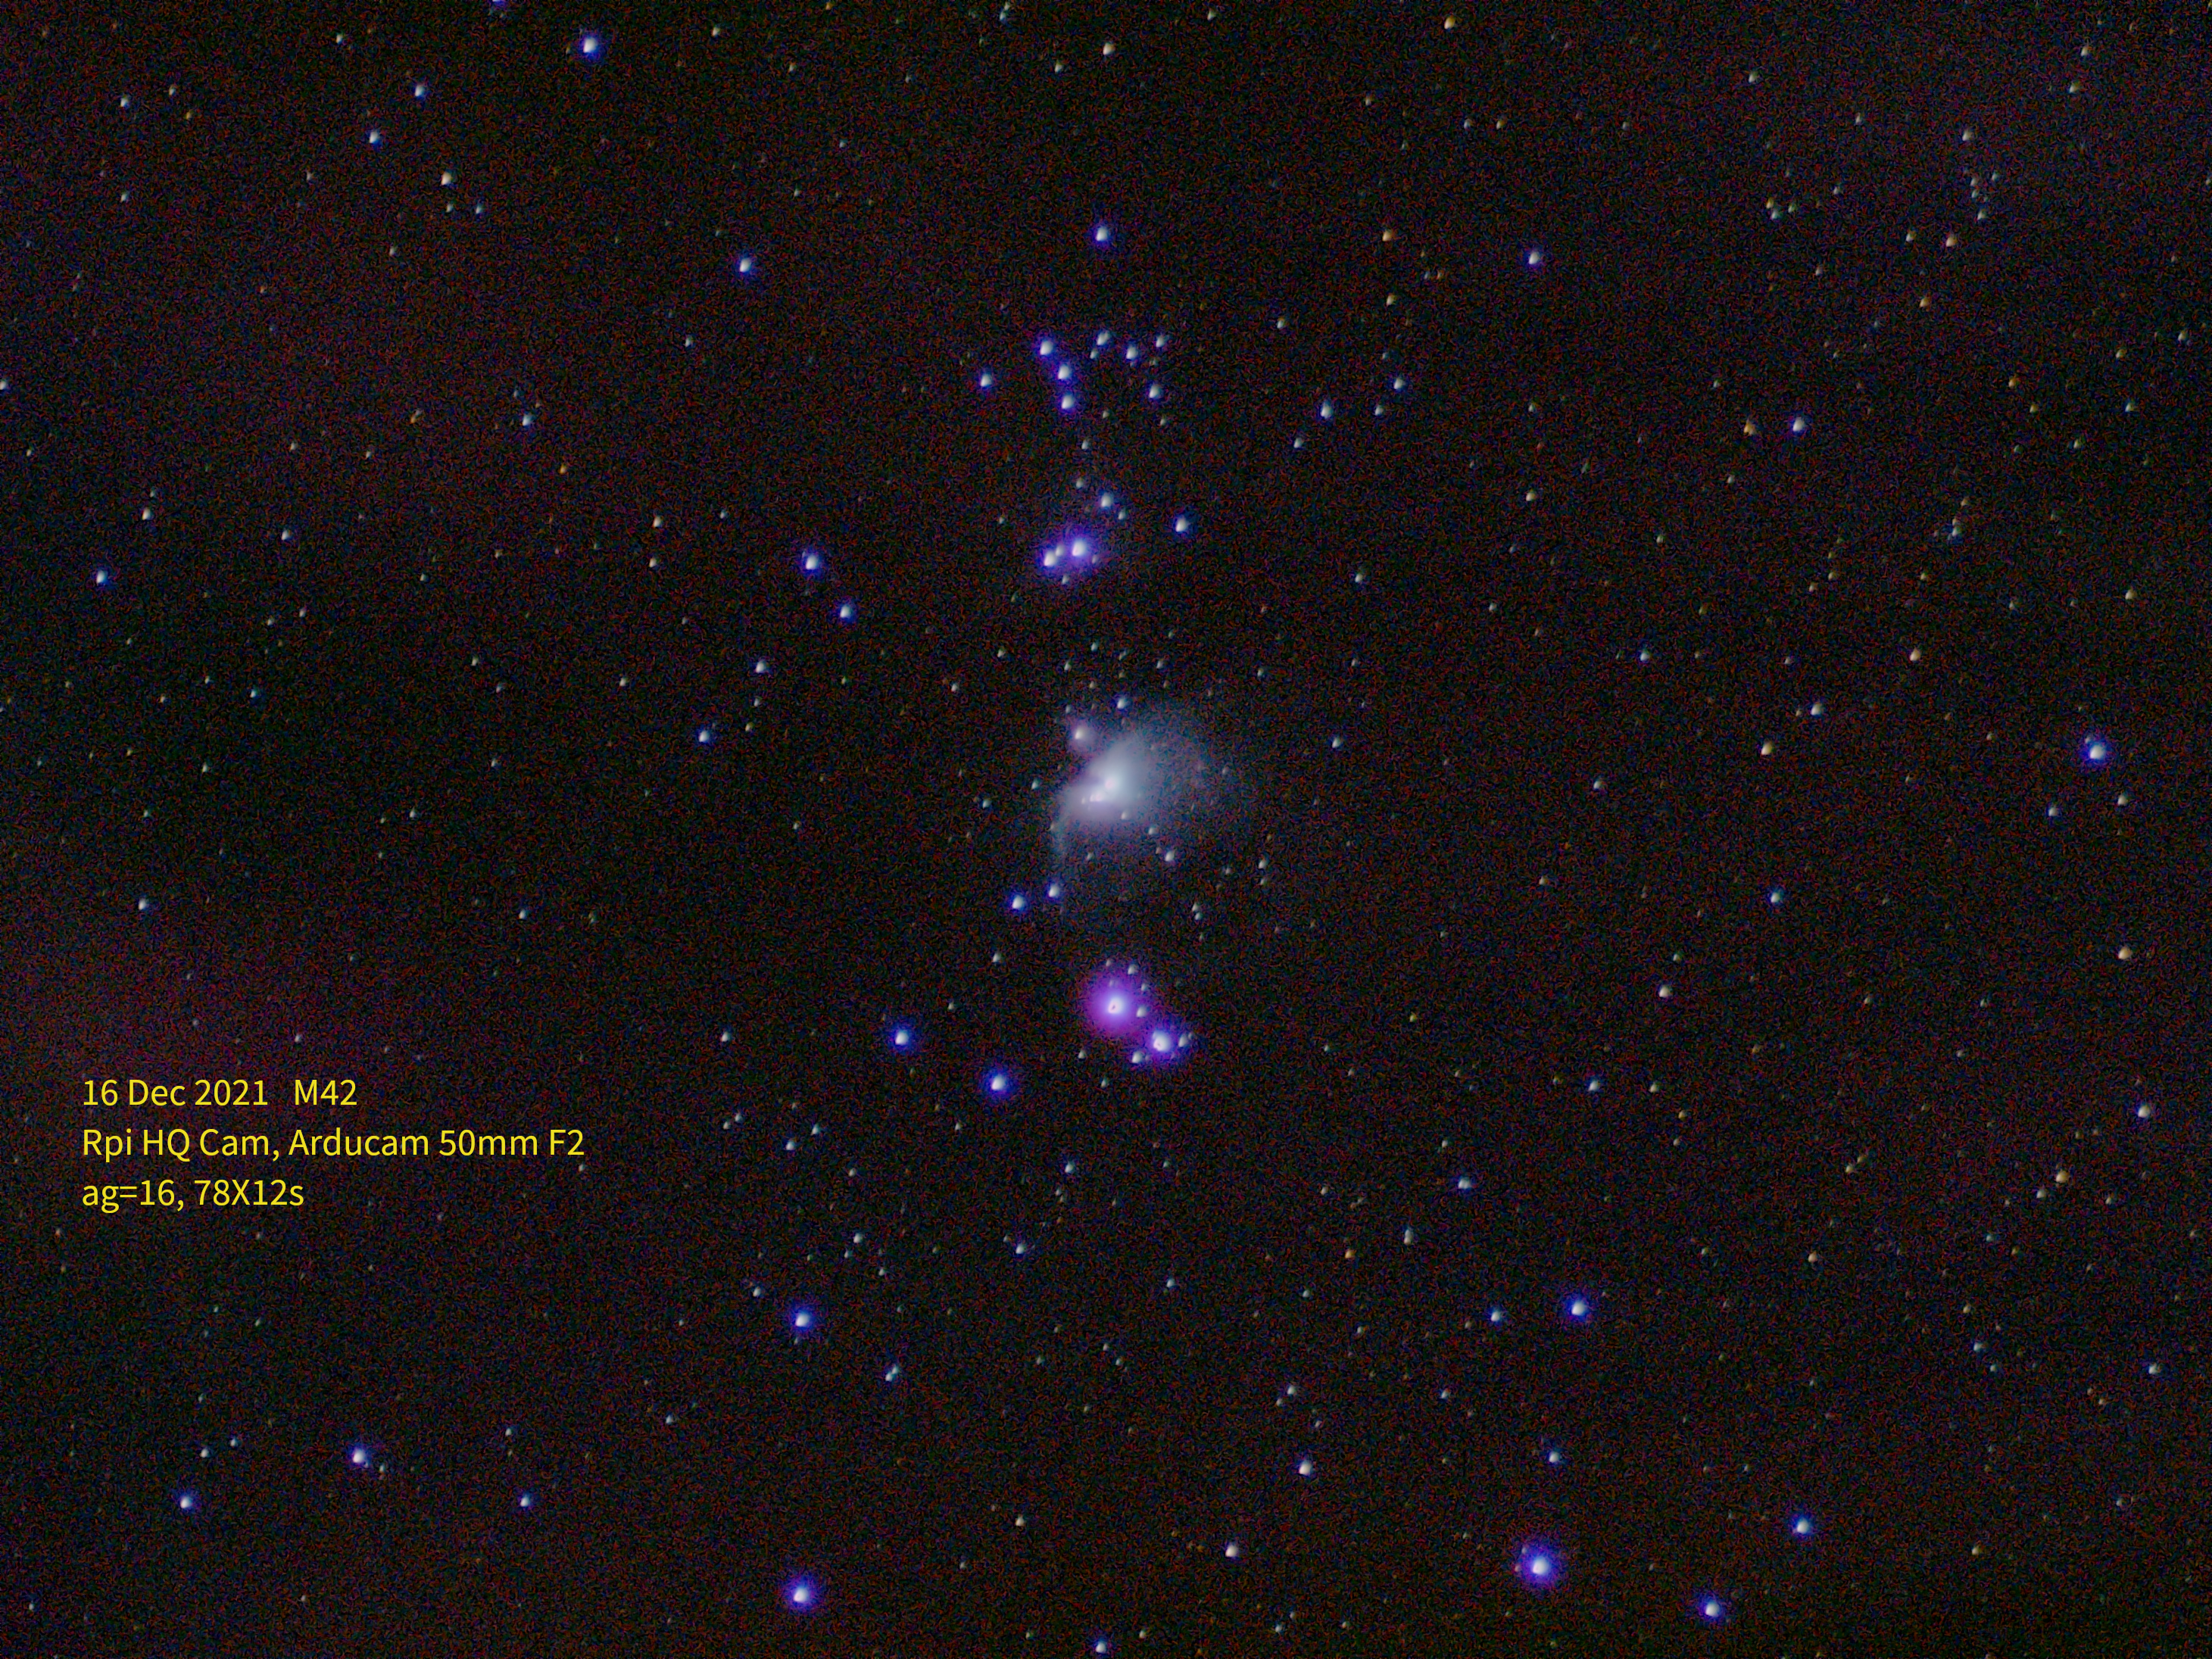
The following, lovely images were taken by Herbert Fu:
M45 galaxy:
M31 galaxy:

M42 galaxy:
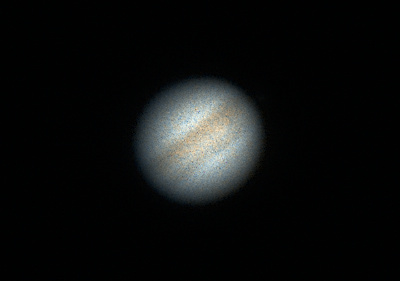
Jupiter:
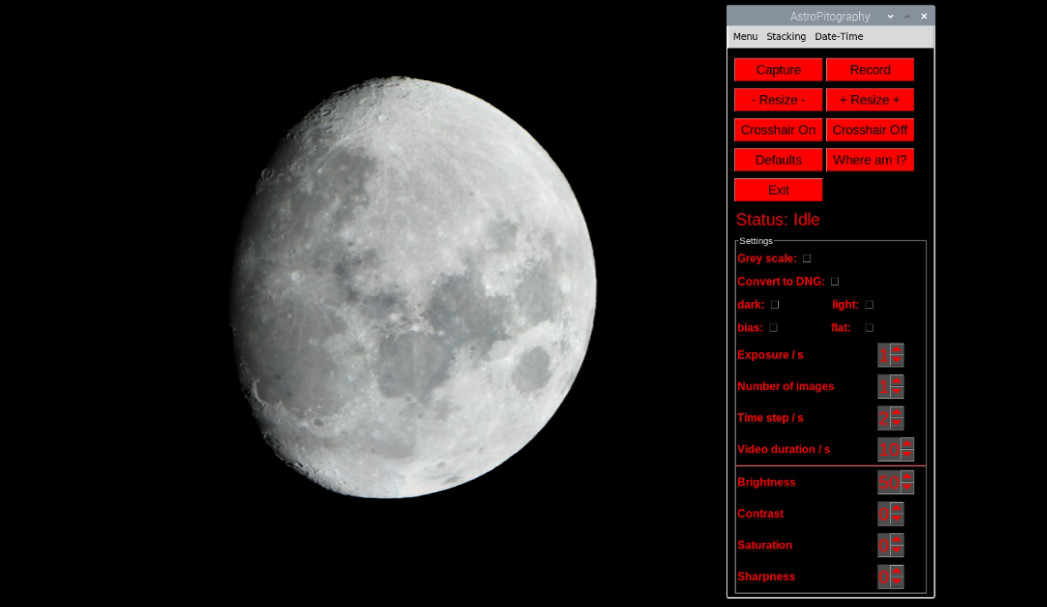
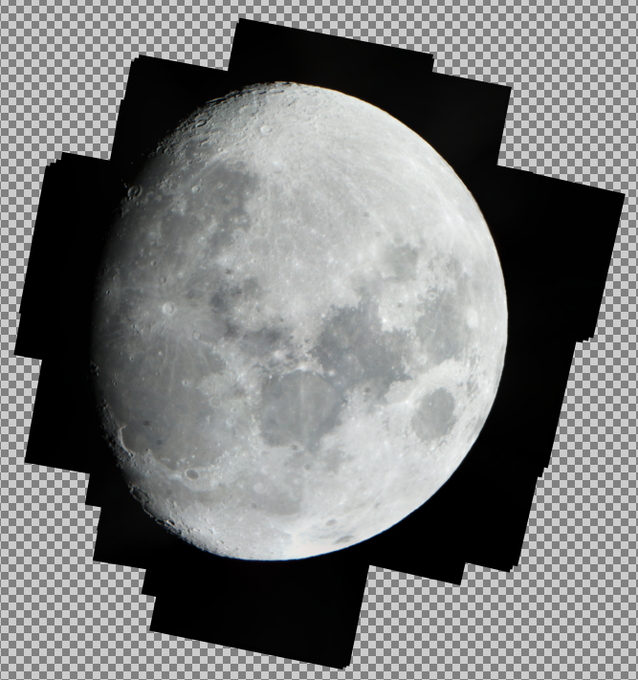
This is an image of the moon I captured:
Release history Release notifications | RSS feed


Download files
Download the file for your platform. If you're not sure which to choose, learn more about installing packages.
Source Distribution
Built Distribution
Hashes for astropitography-0.0.3-py3-none-any.whl
| Algorithm | Hash digest | |
|---|---|---|
| SHA256 | f45e763bdf517fb1e4d28a70b84f1d0a91e22dfc59ce4f7b6a0cb47cf6714fae |
|
| MD5 | 3036c96bf17683a82aa2706fc3561681 |
|
| BLAKE2b-256 | 41496a30ccabe2c46377c580ec1d5bed8dedd4a8d4b0977b4270fbd48a739e58 |


