GenAI Techne System (gtsystem) is a low code Python package for crafting GenAI applications quickly

Project description
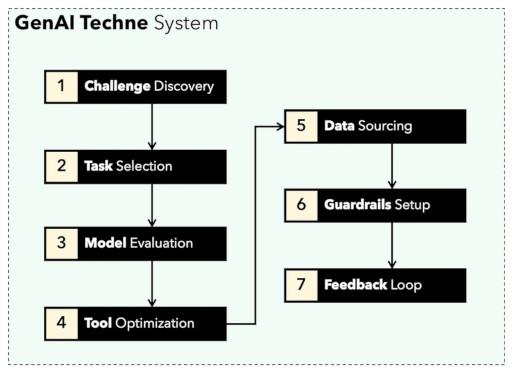
GenAI Techne System (gtsystem)
A low code Python package for crafting GenAI applications quickly
GenAI Techne is on a mission to help enterprise and professionals excel in the craft of Generative AI. Check out the GenAI Techne Substack where you can read more about our mission, read gtsystem documentation, learn from step-by-step tutorials, and influence the roadmap of gtsystem for your use cases.

Getting Started
The get started using gtsystem package follow these steps.
Step 1. Install gtsystem package using pip install gtsystem
Step 2. Open a Jupyter notebook and try this sample.
from gtsystem import openai, bedrock, anthropic, ollama, instrument
prompt = 'How many faces does a tetrahedron have?'
openai.text(prompt)
bedrock.text(prompt)
anthropic.text(prompt)
ollama.text(prompt)
instrument.metrics.stats()
Note: To install the dependencies and setup each of the vendor APIs you can continue reading here.
Features and Notebook Samples
The gtsystem package source is available in this repository on GitHub.
You can read more about the vision behind gtsystem on the GenAI Techne substack post.
You can learn gtsystem API by following along the notebook samples included in the gtsystem repo. This samples are documented on the GenAI Techne Substack.
-
Review model leaderboard: Use
00-leaderboard.ipynbfor reviewing model leaderboard, filter by ranking, vendors, models to decide which one to explore. -
Evaluate models using one line of code: Refer
01-evaluate.ipynbfor single statement prompt evaluations across multiple models including OpenAI GPT, Bedrock hosted Claude or Llama. -
Render LLM responses: Use
02-render.ipynbfor well formatted rendering of the model responses including markdown tables. -
Load evaluation tasks from Excel: Try
03-tasks.ipynbfor automating evaluation tasks - find, list, load prompts by task, including optimal parameter values for temperature and TopP. -
Instrument speed and size (cost) of response: Reuse
04-instrument.ipynbfor instrumenting and comparing multiple models across latency and size of response. -
Benchmark quality of response: Use
05-benchmark.ipynbfor automated benchmarking quality of responses from models like Llama and Claude using GPT-4 as an LLM evaluator. -
Run models on your laptop: Get
06-ollama.ipynbto run models like Mistral, Llama, and CodeLlama locally on your laptop and compare models hosted on Cloud or proprietary model APIs. -
Low code sample: Check out simple
07-low-code-sample.ipynbto appreciate how much can be done with just simple GTSystem APIs. -
Go from prototype to production: Start with
08-prototype-to-production.ipynbto go from prototyping using best models, then exploring local models on laptop, finally comparing fastest vendors like Groq in one seamless workflow. -
Visual chat on Bedrock: Explore
09-chat-bedrock.ipynbfor visual chat using Bedrock hosted models. -
Visual chat on Anthropic: Explore
10-chat-anthropic.ipynbfor visual chat using Anthropic hosted models. -
Visual chat on OpenAI: Explore
11-chat-openai.ipynbfor visual chat using OpenAI GPT4-Turbo.
What's New
2024-04-21 (Release 0.3.1)
- Streamlit chat playground app adds streaming chat models from Ollama, Anthropic, and OpenAI

- PIVOT: Deprecated gtsystem.instrument and gtsystem.benchmark in favor of simplifying gtsystem API
- PIVOT: Only retained support for unique or latest models
- Added ollama.chat
- Deprecated ollama.model_chat/model_text
- Simplified Bedrock to support only Claude3 Sonnet, Haiku models
- Simplified Anthropic chat, text methods
- Simplified Groq text method
- All chat and text methods take model argument with official model name
2024-04-21 (Release 0.2.1)
- Streamlit app with streaming chat playgroud for OpenAI models with configurable system message, temperature, tokens
- New methods for bedrock.chat and anthropic.chat
2024-04-21 (Release 0.1.8)
- Improve configurable quality benchmark criteria
- Ability to merge instrumentation and benchmarking stats in one table
- Quality evaluation tasks dataset
- Configurable GPT4 or Opus model for automated self/other benchmarking
2024-04-20 (Release 0.1.7)
- Render from cached chat history to save time and cost
- Added chat.search feature to search saved openai and claude chats
- Fixed markdown table rendering for render.chat
- Optimized GptChat and ClaudeChat classes to inherit from BaseChat
2024-04-20 (Release 0.1.6)
- Improved benchmark.quality to provide step-by-step weighted criteria based quality scoring
- Parametrized benchmark quality criteria using data/config.yaml
- Minor fixes to groq API
2024-04-19 (Release 0.1.5)
- Groq with Llama3
- Ollama with Llama3
2024-04-19 (Release 0.1.4)
- Stream chat and text for OpenAI
- openai.chat() simplifier API
- GenAI Advisor - Trends feature
2024-04-17 (Release 0.1.3)
- Save, list, load, and render chat for Bedrock/Claude3
- Save, list, load, and render chat for Anthropic
- Save, list, load, and render chat for OpenAI
2024-04-15 (Release 0.1.2)
- Multimodal Chat using OpenAI.
2024-04-14 (Release 0.1.1)
- Multimodal Chat using Anthropic/Claude.
- Multimodal Chat using Bedrock/Claude.
- LMSYS Leaderboard lite integration.
Installing Dependencies
You can install following dependencies to work with gtsystem based on your needs. Start with our requirements.txt or create your own. Then run pip install -r requirements.txt within your environment.
# Python capabilities
pandas
markdown
openpyxl

# Jupyter notebook
jupyterlab
ipywidgets

# AWS for Bedrock managed models
boto3
awscli
botocore

# OpenAI for GPT models
openai

# Anthropic models
anthropic

# Ollama for LLMs running on your laptop
ollama

# Groq for open models on fast Groq LPUs
groq
Amazon Bedrock Setup
To use Amazon Bedrock hosted models like Llama and Claude follow these steps.
Step 1. Login to AWS Console > Launch Identity and Access Management (IAM) > Create a user for Command-Line Interface (CLI) access. Read Bedrock documentation for more details.
Step 2. Install AWS CLI > Run aws configure in Terminal > Add credentials from Step 1.
Ollama Setup
To use Ollama provided LLMs locally on your laptop follow these steps.
Step 1. Download Ollama Note the memory requirements for each model. 7b models generally require at least 8GB of RAM. 13b models generally require at least 16GB of RAM. 70b models generally require at least 64GB of RAM
Step 2. Find model Ollama library > Run command ollama pull <model> in terminal to download the model.
Currently gtsystem supports popular models like llama2, mistral, and llava.
OpenAI Setup
To use OpenAI models follow these steps.
Step 1. Signup for OpenAI API access and get the API key.
Step 2. Add OpenAI API Key to your ~/.zshrc or ~/.bashrc using export OPENAI_API_KEY="your-key-here"
Groq Setup
To use open models on fast Groq LPUs follow these steps.
Step 1. Signup for Groq API access and get the API key.
Step 2. Add Groq API Key to your ~/.zshrc or ~/.bashrc using export GROQ_API_KEY="your-key-here"
Basic Python Environment
If you are new to Python then here is how you can get started from scratch.
First, you should be running the latest Python on your system with Python package manager upgraded to the latest.
python --version
# should return Python 3.10.x or higher as on Jan'23
pip --version
# should return pip 22.3.x or higher as on Jan'23
Follow this guide for Mac OS X if you do not have the latest Python. If installing specific version of Python for managing dependencies then follow this thread to install using pyenv Python version manager. If required upgrade pip to the latest using the following command.
pip install --user --upgrade pip
We will now create a virtual environment for our MLOps setup so that our dependencies are isolated and do not conflict with the system installed packages. We will follow this guide for creating and managing the virtual environment. First change to the directory where we will develop our application.
python -m venv env
If you run ls env you will see following folders and files created.
bin include lib pyvenv.cfg
Now we can activate our virtual environment like so. You will notice that development directory prefixed with the (env) to indicate you are now running in the virtual environment.
. env/bin/activate
You can confirm that you are not running inside the virtual environment with its own Python.
which python
## should return /Users/.../env/bin/python
To leave the virtual environment using deactivate command. Re-enter using same command as earlier.
Release history Release notifications | RSS feed


Download files
Download the file for your platform. If you're not sure which to choose, learn more about installing packages.


