InvenioRDM GitHub Archiver

Project description
IGA
IGA is the InvenioRDM GitHub Archiver, a standalone program as well as a GitHub Action that lets you automatically archive GitHub software releases in an InvenioRDM repository.


Table of contents
- Introduction
- Installation
- Quick start
- Usage
- Known issues and limitations
- Getting help
- Contributing
- License
- Acknowledgments
Introduction
InvenioRDM is the basis for many institutional repositories such as CaltechDATA that enable users to preserve software and datasets in long-term archive. Though such repositories are critical resources, creating detailed records and uploading assets can be a tedious and error-prone process if done manually. This is where the InvenioRDM GitHub Archiver (IGA) comes in.
IGA creates metadata records and sends releases from GitHub to an InvenioRDM-based repository server. IGA can be invoked from the command line; it also can be set up as a GitHub Action to archive GitHub releases automatically for a repository each time they are made.
IGA offers many notable features:
- Automatic metadata extraction from GitHub releases plus
codemeta.jsonandCITATION.cfffiles - Thorough coverage of InvenioRDM record metadata fields using painstaking procedures
- Recognition of id's that appear in CodeMeta & CFF files: ORCID, ROR, DOI, arXiv, PMCID, and more
- Automatic lookup of publication data in DOI.org, PubMed, Google Books, & other sources if needed
- Automatic lookup of organization names in ROR (assuming ROR id's are provided)
- Automatic lookup of human names in ORCID.org if needed (assuming ORCID id's are provided)
- Automatic splitting of human names into family and given names using ML-based methods
- Support for InvenioRDM communities
- Support for overriding the metadata record that IGA creates, for complete control if you need it
- Support for using the GitHub API without a GitHub access token in simple cases
- Extensive use of logging so you can see what's going on under the hood
Installation
You can install IGA as either a typical command-line program on your computer or as a GitHub Action.
As a standalone command-line program
There are multiple ways of installing IGA. Please choose the alternative that suits you.
Alternative 1: installing IGA using pipx
pipxPipx lets you install Python programs in a way that isolates Python dependencies, and yet the resulting iga command can be run from any shell and directory – like any normal program on your computer. If you use pipx on your system, you can install IGA with the following command:
pipx install iga
Pipx can also let you run IGA directly using pipx run iga, although in that case, you must always prefix every IGA command with pipx run. Consult the documentation for pipx run for more information.
Alternative 2: installing IGA using pip
pipYou should be able to install iga with pip for Python 3. To install iga from the Python package repository (PyPI), run the following command:
python3 -m pip install iga
As an alternative to getting it from PyPI, you can use pip to install iga directly from GitHub:
python3 -m pip install git+https://github.com/caltechlibrary/iga.git
If you already installed IGA once before, and want to update to the latest version, add --upgrade to the end of either command line above.
Alternative 3: installing IGA from sources
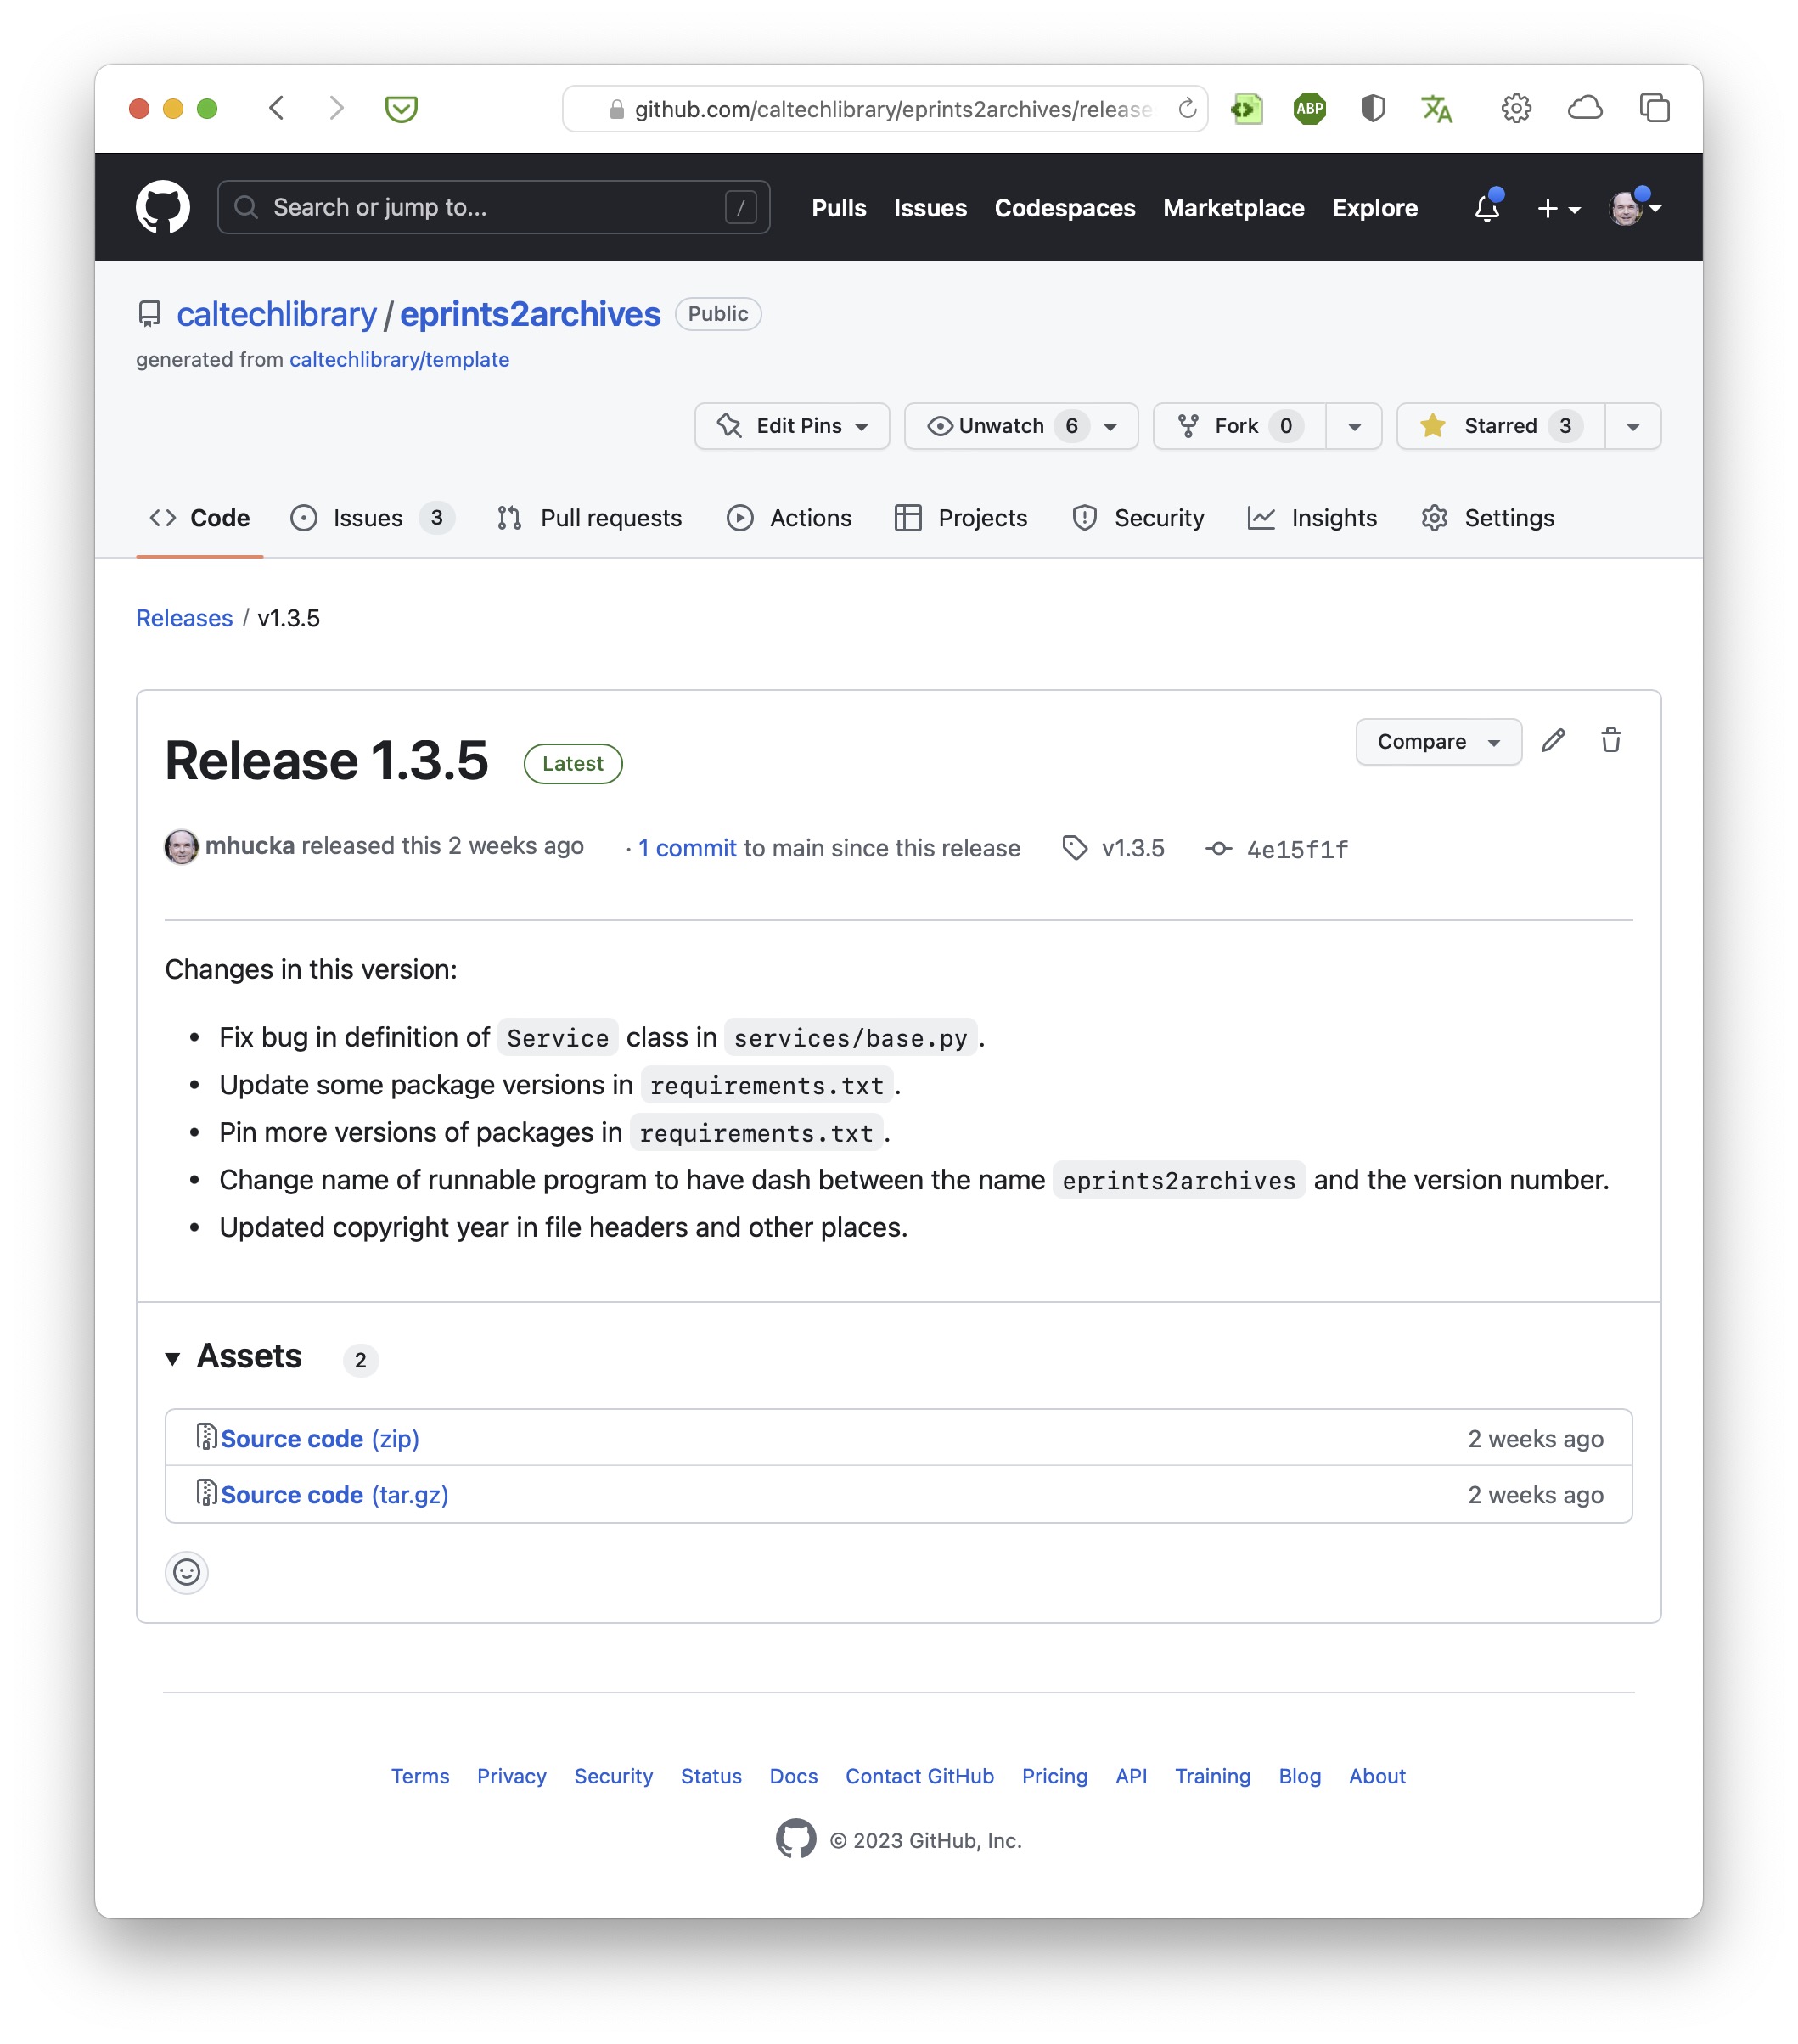
If you prefer to install IGA directly from the source code, first obtain a copy of the source files by either (a) downloading the source archive from the IGA releases page on GitHub, or (b) using git to clone the GitHub repository to a location on your computer:
git clone https://github.com/caltechlibrary/iga
Next, after getting a copy of the files, run setup.py inside the code directory:
cd iga
python3 setup.py install
As a GitHub Action
There are three steps: (A) obtain a Personal Access Token (PAT) from your InvenioRDM server, (B) save the token as a "secret" along with the server address in your GitHub repository, and (C) create an action workflow file in your repository.
A. Obtain an access token from InvenioRDM
- Log in to your InvenioRDM server account.
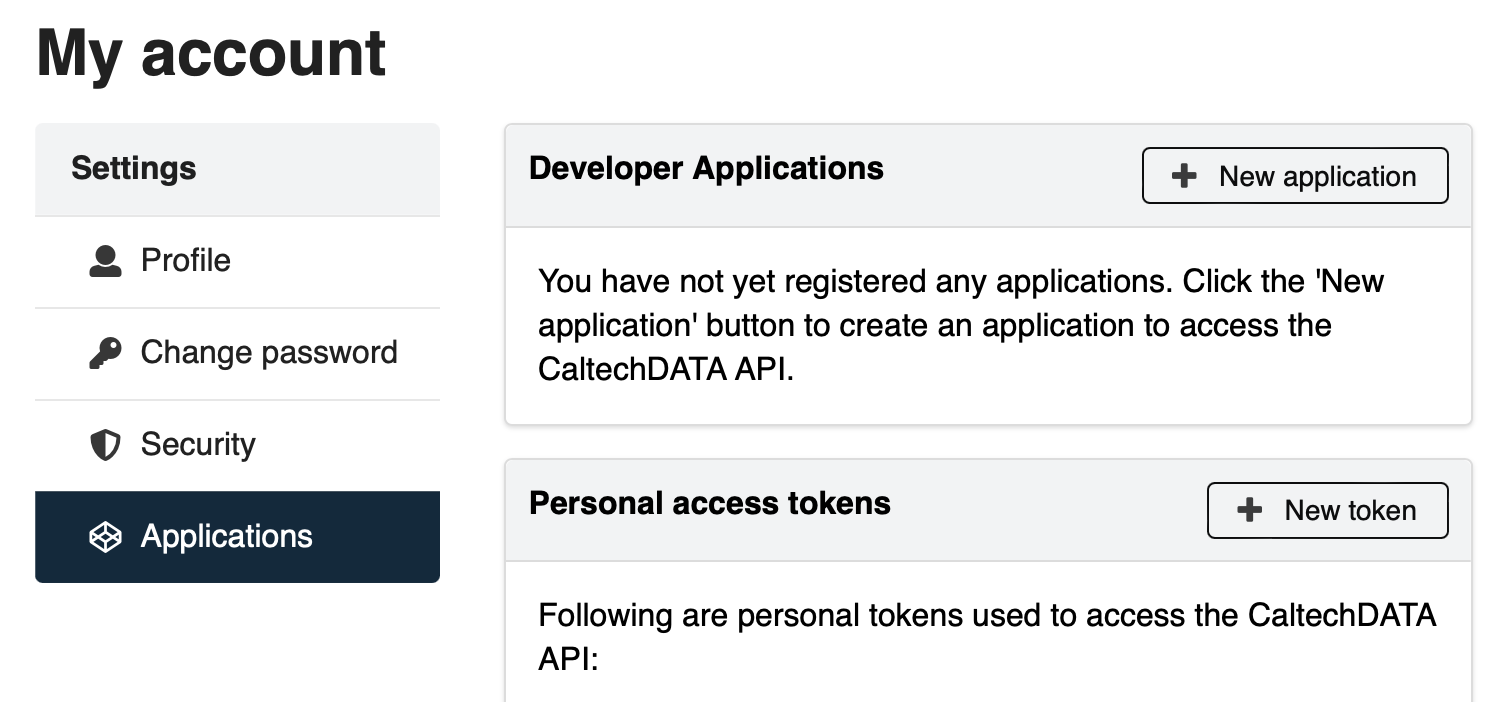
- Find the Applications page of your account.
- Click the New token button next to "Personal access tokens" on the Applications page.
- Name your token (the name does not matter) and click the Create button.
- After InvenioRDM creates and shows you the token, copy the token string to a safe location because InvenioRDM will not show it again.
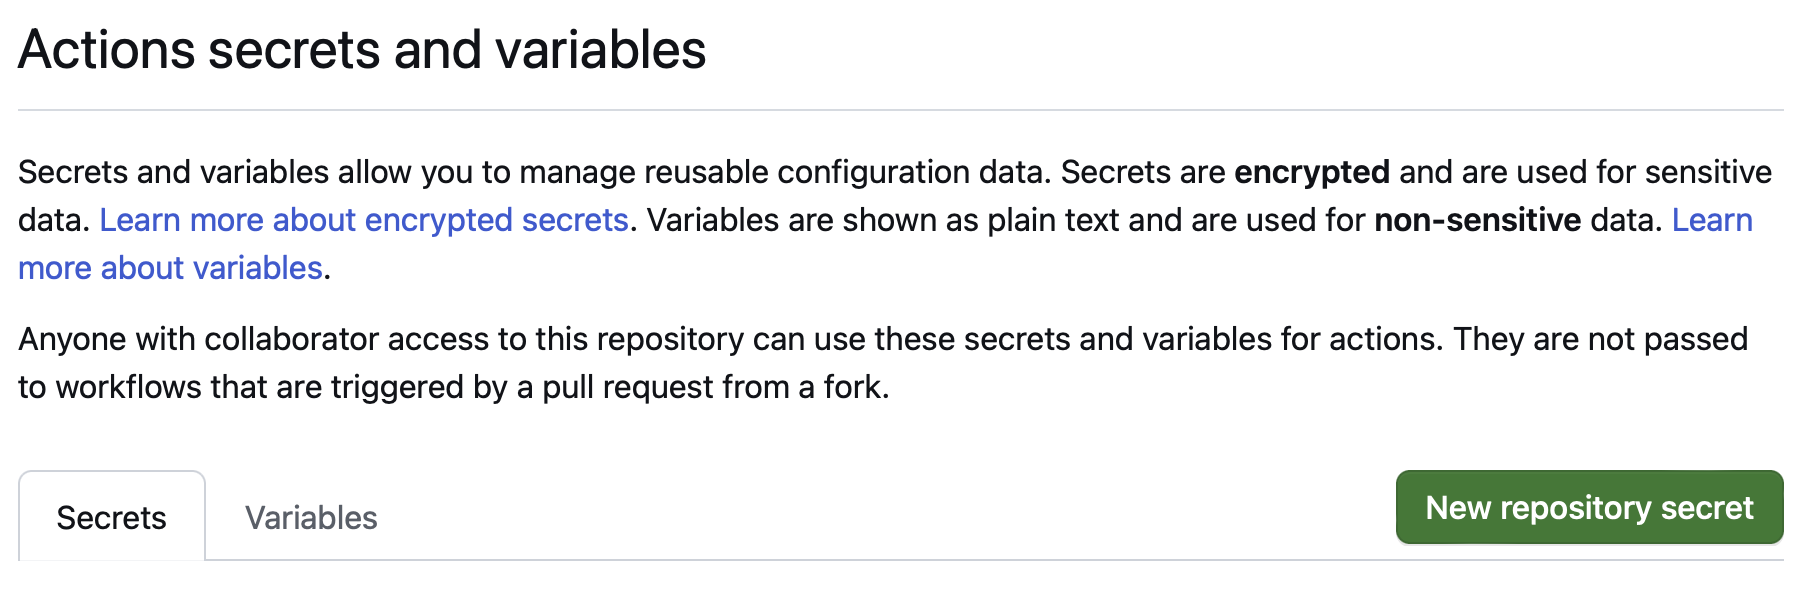
B. Save the token and server address as variables in your GitHub repository
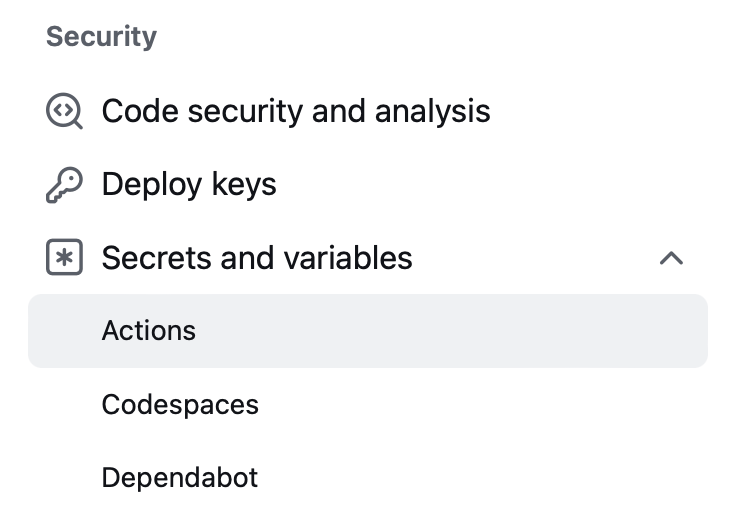
- Go to the Settings page of your GitHub repository. (Note: in the repository, not your user account!)
- In the left-hand sidebar, find Secrets and variables in the Security section, click on it to reveal Actions underneath, then click on Actions.
- In the next page, click the green New repository secret button.
- Name the new variable
INVENIO_TOKENand paste in the token string you obtained in step A.5 above. - Finish the new variable by clicking the green Add secret button.
C. Create a GitHub action workflow in your repository
- In the main branch of your GitHub repository, create a
.github/workflowsdirectory. - In that directory, create a new file named (e.g.)
archive-releases.ymland paste the following into it:on: release: types: [published] workflow_dispatch: jobs: Archive-in-InvenioRDM: runs-on: ubuntu-latest steps: - uses: caltechlibrary/iga@main with: # 👋🏻 Change the following value to be your actual InvenioRDM server 👋🏻 INVENIO_SERVER: https://your-invenio-server.edu # The following variables are optional. See the IGA docs for more info. debug: false draft: false community: false all_assets: false all_metadata: false # The following must be set and should usually be left as-is. INVENIO_TOKEN: ${{secrets.INVENIO_TOKEN}}
- Edit the value of
INVENIO_SERVERabove ↑ to the correct address of your InvenioRDM server. - Save the file, commit the changes to git, and (if you did the steps above outside of GitHub) push your changes to GitHub.
Quick start
Command-line use
If the installation process described above is successful, you should end up with a program named iga in a location where software is normally installed on your computer. Running iga should be as simple as running any other command-line program. For example, the following command should print a helpful message to your terminal:
iga --help
IGA needs 4 pieces of information to do its work, though for simple repositories you can often get by with just 3:
- (Required) The identity of the GitHub release to be archived
- (Required) The address of the destination InvenioRDM server
- (Required) A Personal Access Token (PAT) for the InvenioRDM server
- (Optional) A Personal Access Token for GitHub
The first one (the identity of the GitHub release) is given as arguments to IGA on the command line; the rest can be provided either via command-line options or by setting environment variables. A common way of configuring IGA is to set environment variables in your shell script or your interactive shell. Here is an example using Bash shell syntax, with realistic-looking but fake token values:
export INVENIO_SERVER=https://data.caltech.edu
export INVENIO_TOKEN=qKLoOH0KYf4D98PGYQGnC09hiuqw3Y1SZllYnonRVzGJbWz2
export GITHUB_TOKEN=ghp_wQXp6sy3AsKyyEo4l9esHNxOdo6T34Zsthz
Once these environment variables set in your shell, you can more easily invoke IGA. Usage can be as simple as providing a URL for a release in GitHub. For example, the following command creates a draft record (the -d option is short for --draft) for release v1.2.0 of one of the author's other projects:
iga -d https://github.com/mhucka/taupe/releases/tag/v1.2.0
If you give the option --open (or -o for short) to IGA, it will open the newly-created InvenioRDM entry in your default web browser when it's done:
iga -o -d https://github.com/mhucka/taupe/releases/tag/v1.2.0
More options and examples can be found in the section on detailed usage information below.
GitHub Action use
With the GitHub Action workflow installed in your repository as described above, the next time you do a release in your GitHub repository, the workflow will archive the release in the InvenioRDM server determined by the value of INVENIO_SERVER.
You can check the results (and look for errors if something went wrong) by going to the Actions tab in your GitHub repository.
Usage
This section provides detailed information about IGA's operation and options to control it.
Identifying the InvenioRDM server
The server address must be provided either as the value of the option --invenio-server or in an environment variable named INVENIO_SERVER. If the server address does not begin with https://, IGA will prepend it automatically.
Providing an InvenioRDM access token
A Personal Access Token (PAT) for making API calls to the InvenioRDM server must be also supplied when invoking IGA. The preferred method is to set the value of the environment variable INVENIO_TOKEN. Alternatively, you can use the option --invenio-token to pass the token on the command line, but you are strongly advised to avoid this practice because it is insecure.
To obtain a PAT from an InvenioRDM server, first log in to the server, then visit the page at /account/settings/applications and use the interface there to create a token. The token will be a long string of alphanumeric characters such as OH0KYf4PGYQGnCM4b53ejSGicOC4s4YnonRVzGJbWxY; set the value of the variable INVENIO_TOKEN to this string.
Providing a GitHub access token
It may be possible for you to run the command-line version of IGA without providing a GitHub access token. GitHub allows up to 60 API calls per minute when running without credentials, and though IGA makes several API calls to GitHub each time it runs, for some repositories IGA will not hit the limit. However, if you run IGA multiple times in a row or your repository has many contributors, then you may need to supply a GitHub access token. The preferred way of doing that is to set the value of the environment variable GITHUB_TOKEN. Alternatively, you can use the option --github-token to pass the token on the command line, but you are strongly advised to avoid this practice because it is insecure. To obtain a PAT from GitHub, visit https://docs.github.com/en/authentication and follow the instructions for creating a "classic" personal access token.
Note that when you run IGA as a GitHub Action, you do not need to create or set a GitHub token because it is obtained automatically by the GitHub Action workflow.
Specifying a GitHub release
A GitHub release can be specified to IGA in one of two mutually-exclusive ways:
- The full URL of the web page on GitHub of a tagged release. In this case,
the URL must be the final argument on the command line invocation of IGA
and the options
--accountand--repomust be omitted. - A combination of account name, repository name, and tag. In this
case, the final argument on the command line must be the tag, and in
addition, values for the options
--accountand--repomust be provided.
Here's an example using approach #1 (assuming environment variables INVENIO_SERVER, INVENIO_TOKEN, and GITHUB_TOKEN have all been set):
iga https://github.com/mhucka/taupe/releases/tag/v1.2.0
and here's the equivalent using approach #2:
iga --github-account mhucka --github-repo taupe v1.2.0
Note that when using this form of the command, the release tag (v1.2.0 above) must be the last item given on the command line.
Gathering metadata for an InvenioRDM record
The record created in InvenioRDM is constructed using information obtained using GitHub's API as well as several other APIs as needed. The information includes the following:
- (if one exists) a
codemeta.jsonfile in the GitHub repository - (if one exists) a
CITATION.cfffile in the GitHub repository - data available from GitHub for the release
- data available from GitHub for the repository
- data available from GitHub for the account of the owner
- data available from GitHub for the accounts of repository contributors
- file assets associated with the GitHub release
- data available from ORCID.org for ORCID identifiers
- data available from ROR.org for Research Organization Registry identifiers
- data available from DOI.org, NCBI, Google Books, & others for publications
- data available from spdx.org for software licenses
IGA tries to use CodeMeta.json first and CITATION.cff second to fill out the fields of the InvenioRDM record. If neither of those files are present, IGA uses values from the GitHub repository instead. You can make it always use all sources of info with the option --all-metadata. Depending on how complete and up-to-date your CodeMeta.json and CITATION.cff are, this may or may not make the record more comprehensive and may or may not introduce redundancies or unwanted values.
To override the auto-created metadata, use the option --read-metadata followed by the path to a JSON file structured according to the InvenioRDM schema used by the destination server. When --read-metadata is provided, IGA does not extract the data above, but still obtains the file assets from GitHub.
Specifying GitHub file assets
By default, IGA attaches to the InvenioRDM record only the ZIP file asset created by GitHub for the release. To make IGA attach all assets associated with the GitHub release, use the option --all-assets.
To upload specific file assets and override the default selections made by IGA, you can use the option --file followed by a path to a file to be uploaded. You can repeat the option --file to upload multiple file assets. Note that if --file is provided, then IGA does not use any file assets from GitHub; it is the user's responsibility to supply all the files that should be uploaded.
If both --read-metadata and --file are used, then IGA does not actually contact GitHub for any information.
Handling communities
To submit your record to a community, use the --community option together with a community name. The option --list-communities can be used to get a list of communities supported by the InvenioRDM server. Note that submitting a record to a community means that the record will not be finalized and will not be publicly visible when IGA finishes; instead, the record URL that you receive will be for a draft version, pending review by the community moderators.
Indicating draft versus published records
If the --community option is not used, then by default, IGA will finalize and publish the record. To make it stop short and leave the record as a draft instead, use the option --draft. The draft option also takes precedence over the community option: if you use both --draft and --community, IGA will stop after creating the draft record and will not submit it to the community. (You can nevertheless submit the record to a community manually once the draft is created, by visiting the record's web page and using the InvenioRDM interface there.)
Versioning records
The option --parent-record can be used to indicate that the record being constructed is a new version of an existing record. This will make IGA use the InvenioRDM API for record versioning. The newly-created record will be linked to a parent record identified by the value passed to --parent-record. The value must be either an InvenioRDM record identifier (which is a sequence of alphanumeric characters of the form XXXXX-XXXXX, such as bknz4-bch35, generated by the InvenioRDM server), or a URL to the landing page of the record in the InvenioRDM server. (Note that such URLs end in the record identifier.) Here is an example of using this option:
iga --parent-record xbcd4-efgh5 https://github.com/mhucka/taupe/releases/tag/v1.2.0
Other options recognized by IGA
Running IGA with the option --save-metadata will make it create a metadata record, but instead of uploading the record (and any assets) to the InvenioRDM server, IGA will write the result to the given destination. This can be useful not only for debugging but also for creating a starting point for a custom metadata record: first run IGA with --save-metadata to save a record to a file, edit the result, then finally run IGA with the --read-metadata option to use the modified record to create a release in the InvenioRDM server.
The --mode option can be used to change the run mode. Four run modes are available: quiet, normal, verbose, and debug. The default mode is normal, in which IGA prints a few messages while it's working. The mode quiet will make it avoid printing anything unless an error occurs, the mode verbose will make it print a detailed trace of what it is doing, and the mode debug will make IGA even more verbose. In addition, in debug mode, IGA will drop into the pdb debugger if it encounters an exception during execution. On Linux and macOS, debug mode also installs a signal handler on signal USR1 that causes IGA to drop into the pdb debugger if the signal USR1 is received. (Use kill -USR1 NNN, where NNN is the IGA process id.)
By default, the output of the normal, verbose, and debug run modes is sent to the standard output (normally the terminal console). The option --log-dest can be used to send the output to the given destination instead. The value can be - to indicate console output, or a file path to send the output to the file. A special exception is that even if a log destination is given, IGA will still print the final record URL to stdout. This makes it possible to invoke IGA from scripts that capture the record URL while still saving diagnostic output in case debugging is needed. Here is an example command line in which the final record URL is assigned to a variable named url (and note the quote characters are backquotes/backticks, not forward quotes):
url=`iga -m verbose -l iga.out https://github.com/mhucka/taupe/releases/tag/v1.2.0`
Networks latencies are unpredicatable. Reading and writing large files may take a long time; on the other hand, IGA should not wait forever before reporting an error if a server or network becomes unresponsive. To balance these conflicting needs, IGA automatically scales its network timeout based on file sizes. To override its adaptive algorithm and set an explicit timeout value, use the option --timeout with a value in seconds.
If given the --version option, this program will print its version and other information, and exit without doing anything else.
Running IGA with the option --help will make it print help text and exit without doing anything else.
Summary of command-line options
As explain above, IGA takes one required argument on the command line: either (1) the full URL of a web page on GitHub of a tagged release, or (2) a release tag name which is to be used in combination with options --github-account and --github-repo. The following table summarizes all the command line options available.
| Long form option | Short | Meaning | Default | |
|---|---|---|---|---|
--all-assets |
-A |
Attach all GitHub assets | Attach only the release source ZIP | |
--all-metadata |
-M |
Include additional metadata from GitHub | Favor CodeMeta & CFF | |
--community C |
-c C |
Submit record to RDM community C | Don't submit record to any community | |
--draft |
-d |
Mark the RDM record as a draft | Publish record when done | |
--file F |
-f F |
Upload local file F instead of GitHub assets | Upload only GitHub assets | ⚑ |
--github-account A |
-a A |
Look in GitHub account A | Get account name from release URL | ✯ |
--github-repo R |
-r R |
Look in GitHub repository R of account A | Get repo name from release URL | ✯ |
--github-token T |
-t T |
Use GitHub acccess token T | Use value in env. var. GITHUB_TOKEN |
|
--help |
-h |
Print help info and exit | ||
--invenio-server S |
-s S |
Send record to InvenioRDM server at address S | Use value in env. var. INVENIO_SERVER |
|
--invenio-token K |
-k K |
Use InvenioRDM access token K | Use value in env. var. INVENIO_TOKEN |
|
--list-communities |
-L |
List communities available for use with --community |
||
--log-dest L |
-l L |
Write log output to destination L | Write to terminal | ⚐ |
--mode M |
-m M |
Run in mode quiet, normal, verbose, or debug |
normal |
|
--open |
-o |
Open record's web page in a browser when done | Do nothing when done | |
--parent-record N |
-p N |
Make this a new version of existing record N | New record is unrelated to other records | ❖ |
--read-metadata R |
-R R |
Read metadata record from file R; don't build one | Build metadata record | |
--save-metadata D |
-S D |
Save metadata record to file D; don't upload it | Upload to InvenioRDM server | |
--timeout X |
-T X |
Wait on network operations a max of X seconds | Auto-adjusted based on file size | |
--version |
-V |
Print program version info and exit |
⚑ Can repeat the option to specify multiple files.
⚐ To write to the console, use the character - as the value of OUT; otherwise, OUT must be the name of a file where the output should be written.
✯ When using --github-account and --github-repo, the last argument on the command line must be a release tag name.
❖ The record identifier must be given either as a sequence of alphanumeric characters of the form XXXXX-XXXXX (e.g., bknz4-bch35), or as a URL to the landing page of an existing record in the InvenioRDM server.
Return values
This program exits with a return status code of 0 if no problem is encountered. Otherwise, it returns a nonzero status code. The following table lists the possible values:
| Code | Meaning |
|---|---|
| 0 | success – program completed normally |
| 1 | interrupted |
| 2 | encountered a bad or missing value for an option |
| 3 | encountered a problem with a file or directory |
| 4 | encountered a problem interacting with GitHub |
| 5 | encountered a problem interacting with InvenioRDM |
| 6 | an exception or fatal error occurred |
Known issues and limitations
The following are known issues and limitations.
- As of early 2023, InvenioRDM requires names of record creators and other contributors to be split into given (first) and family (surname). This is problematic for multiple reasons. The first is that mononyms are common in many countries: a person's name may legitimately be only a single word which is not conceptually a "given" or "family" name. To compound the difficulty for IGA, names are stored as single fields in GitHub account metadata, so unless a repository has a
codemeta.jsonorCITATION.cfffile (which allow authors more control over how they want their names represented), IGA is forced to try to split the single GitHub name string into two parts. A foolproof algorithm for doing this does not exist, so IGA will sometimes get it wrong. (That said, IGA goes to extraordinary lengths to try to do a good job.) - Some accounts on GitHub are software automation or "bot" accounts but are not labeled as such. These accounts are generally indistinguishable from human accounts on GitHub. If such an account is the creator of a release in GitHub, and IGA has to use its name-splitting algorithm on the name of the account, it may produce a nonsensical result. For example, it might turn "Travis CI" into an entry with a first name of "Travis" and last name of "CI".
Getting help
If you find an issue, please submit it in the GitHub issue tracker for this repository.
Contributing
Your help and participation in enhancing IGA is welcome! Please visit the guidelines for contributing for some tips on getting started.
License
Software produced by the Caltech Library is Copyright © 2023 California Institute of Technology. This software is freely distributed under a BSD-style license. Please see the LICENSE file for more information.
Acknowledgments
This work was funded by the California Institute of Technology Library.
IGA uses multiple other open-source packages, without which it would have taken much longer to write the software. I want to acknowledge this debt. In alphabetical order, the packages are:
- Aenum – package for advanced enumerations
- Arrow – a library for creating & manipulating dates
- Boltons – package of miscellaneous Python utilities
- caltechdata_api – package for using the CaltechDATA API
- CommonPy – a collection of commonly-useful Python functions
- demoji – find or remove emojis from text
- dirtyjson – JSON decoder that copes with problematic JSON files and reports useful error messages
- flake8 – Python code linter and style analyzer
- httpx – HTTP client library that supports HTTP/2
- humanize – make numbers more easily readable by humans
- idutils – package for validating and normalizing various kinds of persistent identifiers
- ipdb – the IPython debugger
- iptools – utilities for dealing with IP addresses
- isbnlib – utilities for dealing with ISBNs
- json5 – extended JSON format parser
- latexcodec – lexer and codec to work with LaTeX code in Python
- lxml – an XML parsing library
- Markdown – Python package for working with Markdown
- markdown-checklist – GitHub-style checklist extension for Python Markdown package
- mdx-breakless-lists – GitHub-style Markdown lists that don't require a line break above them
- mdx_linkify – extension for Python Markdown will convert text that look like links to HTML anchors
- nameparser – package for parsing human names into their individual components
- probablepeople – package for parsing names into components using ML-based techniques
- pymdown-extensions – extensions for Python Markdown
- PyYAML – YAML parser
- pybtex – BibTeX parser and formatter
- pybtex-apa7-style – plugin for pybtex that provides APA7 style formatting
- pytest – testing framework
- pytest-cov – coverage reports for use with
pytest - pytest-mock – wrapper around the
mockpackage for use withpytest - Rich – library for writing styled text to the terminal
- rich-click – CLI interface built on top of Rich
- Sidetrack – simple debug logging/tracing package
- spaCy – Natural Language Processing package
- spacy-alignments – alternate alignments for spaCy
- spacy-legacy – spaCy legacy functions and architectures for backwards compatibility
- spacy-loggers – loggers for spaCy
- spacy-pkuseg – Chinese word segmentation toolkit for spaCy
- spacy-transformers – pretrained Transformers for spaCy
- setuptools – library for
setup.py - StringDist – library for calculating string distances
- Twine – utilities for publishing Python packages on PyPI
- url-normalize – URI/URL normalization utilities
- validators – data validation package for Python
- wheel – setuptools extension for building wheels

Release history Release notifications | RSS feed


Download files
Download the file for your platform. If you're not sure which to choose, learn more about installing packages.


