The AlphaPept Deep (PeptDeep) Learning Platform for Proteomics


Project description
AlphaPeptDeep


About
AlphaPeptDeep (peptdeep for short) aims to easily build new deep
learning models for shotgun proteomics studies. Transfer learning is
also easy to apply using AlphaPeptDeep.
It contains some built-in models such as retention time (RT), collision cross section (CCS), and tandem mass spectrum (MS2) prediction for given peptides. With these models, one can easily generate a predicted library from fasta files.
For details, check out our publications.
For documentation, see GitHub pages.
License
AlphaPeptDeep was developed by the Mann Labs at the Max Planck Institute of Biochemistry and the University of Copenhagen and is freely available with an Apache License. External Python packages (available in the requirements folder) have their own licenses, which can be consulted on their respective websites.
Installation
AlphaPeptDeep can be installed and used on all major operating systems (Windows, macOS and Linux).
There are three different types of installation possible:
- One-click GUI installer: Choose this installation if you only want the GUI and/or keep things as simple as possible.
- Pip installer: Choose this installation if you want to use peptdeep as a Python package in an existing Python (recommended Python 3.8) environment (e.g. a Jupyter notebook). If needed, the GUI and CLI can be installed with pip as well.
- Developer installer: Choose this installation if you are familiar with CLI tools, conda and Python. This installation allows access to all available features of peptdeep and even allows to modify its source code directly. Generally, the developer version of peptdeep outperforms the precompiled versions which makes this the installation of choice for high-throughput experiments.
One-click GUI
The GUI of peptdeep is a completely stand-alone tool that requires no knowledge of Python or CLI tools. Click on one of the links below to download the latest release for:
Older releases remain available on the release page, but no backwards compatibility is guaranteed.
Note that these installers do not have GPU supported.
Pip
peptdeep can be installed in an existing Python 3.8 environment with a
single bash command. This bash command can also be run directly
from within a Jupyter notebook by prepending it with a !:
pip install peptdeep
Installing peptdeep like this avoids conflicts when integrating it in other tools, as this does not enforce strict versioning of dependancies. However, if new versions of dependancies are released, they are not guaranteed to be fully compatible with peptdeep. This should only occur in rare cases where dependencies are not backwards compatible.
TODO You can always force peptdeep to use dependancy versions which are known to be compatible with:
pip install "peptdeep[stable]"NOTE: You might need to run
pip install pipbefore installing peptdeep like this. Also note the double quotes".
For those who are really adventurous, it is also possible to directly
install any branch (e.g. @development) with any extras
(e.g. #egg=peptdeep[stable,development-stable]) from GitHub with e.g.
pip install "git+https://github.com/MannLabs/alphapeptdeep.git@development#egg=peptdeep[stable,development-stable]"
Use GPU
To enable GPU, GPU version of PyTorch is required, it can be installed with:
pip install torch --extra-index-url https://download.pytorch.org/whl/cu116 --upgrade
Note that this may depend on your NVIDIA driver version. Run the command to check your NVIDIA driver:
nvidia-smi
See pytorch.org for details.
Developer
peptdeep can also be installed in editable (i.e. developer) mode with a
few bash commands. This allows to fully customize the software and
even modify the source code to your specific needs. When an editable
Python package is installed, its source code is stored in a transparent
location of your choice. While optional, it is advised to first (create
and) navigate to e.g. a general software folder:
mkdir ~/alphapeptdeep/project/folder
cd ~/alphapeptdeep/project/folder
The following commands assume you do not perform any additional cd
commands anymore.
Next, download the peptdeep repository from GitHub either directly or
with a git command. This creates a new peptdeep subfolder in your
current directory.
git clone https://github.com/MannLabs/alphapeptdeep.git
For any Python package, it is highly recommended to use a separate conda virtual environment, as otherwise dependancy conflicts can occur with already existing packages.
conda create --name peptdeep python=3.8 -y
conda activate peptdeep
Finally, peptdeep and all its dependancies need to be
installed. To take advantage of all features and allow development (with
the -e flag), this is best done by also installing the development
dependencies instead of only
the core dependencies:
pip install -e ".[development]"
By default this installs loose dependancies (no explicit versioning),
although it is also possible to use stable dependencies
(e.g. pip install -e ".[stable,development-stable]").
By using the editable flag -e, all modifications to the peptdeep
source code folder are directly reflected when running
peptdeep. Note that the peptdeep folder cannot be moved and/or renamed
if an editable version is installed. In case of confusion, you can
always retrieve the location of any Python module with e.g. the command
import module followed by module.__file__.
We used nbdev v2 for developers to build
Python source code and docs smoothly from Python notebooks, so please do
not edit .py files directly, edit .ipynb in nbdev_nbs folder instead.
After installing nbdev, cd to alphapeptdeep project folder and run:
nbdev_install_hooks
to init gitconfig for nbdev. After editing the source code in .ipynb
files, using nbdev_export to build python source code and nbdev_test
to run all .ipynb files in nbdev_nbs for testing. Check nbdev
docs for more information.
Usage
There are three ways to use peptdeep:
NOTE: The first time you use a fresh installation of peptdeep, it is often quite slow because some functions might still need compilation on your local operating system and architecture. Subsequent use should be a lot faster.
GUI
If the GUI was not installed through a one-click GUI installer, it can
be activate with the following bash command:
peptdeep gui
This command will start a web server and automatically open the default
browser:
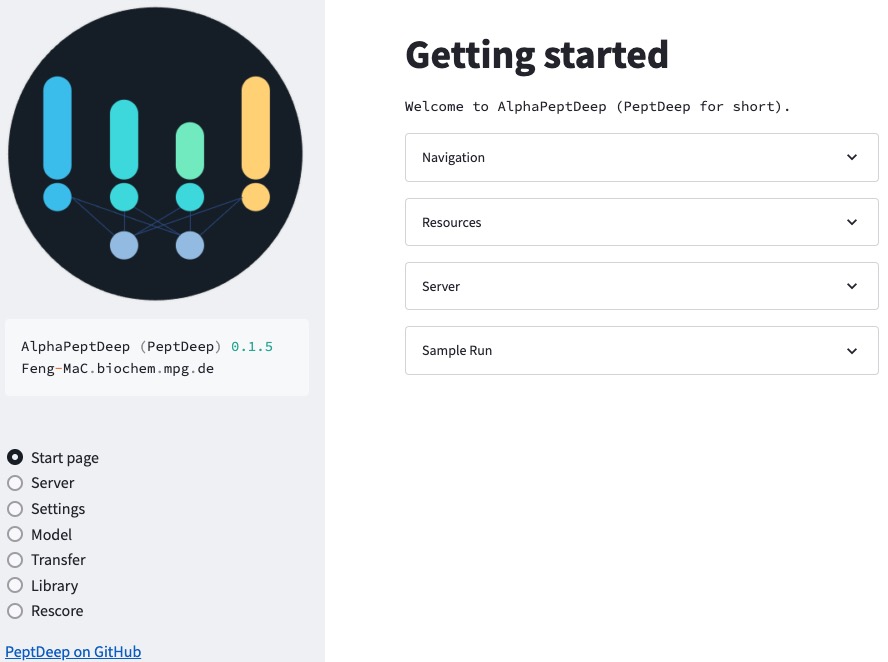
There are several options in the GUI (left panel): * Server: Start/stop the task server, check tasks in the task queue * Settings: Configure common settings, load/save current settings * Model: Configure DL models for prediction or transfer learning * Transfer: Refine the model * Library: Predict a library * Rescore: Perform ML feature extraction and Percolator
CLI
The CLI can be run with the following command (after activating the
conda environment with conda activate peptdeep or if an alias was
set to the peptdeep executable):
peptdeep -h
It is possible to get help about each function and their (required)
parameters by using the -h flag. AlphaPeptDeep provides several
commands for CLI uses:
Run a command to check usages:
peptdeep $command -h
For example:
peptdeep library -h
export-settings
peptdeep export-settings yaml_file
This command will export the default settings into the yaml_file as a
template, users can edit the yaml file to run other commands.
The common settings in the yaml file are:
model_url: "https://github.com/MannLabs/alphapeptdeep/releases/download/pre-trained-models/pretrained_models.zip"

thread_num: 8
torch_device:
  name: gpu
  ids: []
  name_choices:
    - gpu
    - cpu
    - mps

log_level: info
log_level_choices:
  - debug
  - info
  - warning
  - error
  - critical

common:
  modloss_importance_level: 1.0

peak_matching:
  ms2_ppm: True
  ms2_tol_value: 20.0
  ms1_ppm: True
  ms1_tol_value: 20.0

model_mgr:
  default_nce: 30.0
  default_instrument: Lumos
  mask_modloss: True
  model_type: generic
  model_choices:
  - generic
  - phos
  - hla # same as generic
  - digly
  external_ms2_model: ''
  external_rt_model: ''
  external_ccs_model: ''
  instrument_group:
    Lumos: Lumos
    QE: QE
    timsTOF: timsTOF
    SciexTOF: SciexTOF
    Fusion: Lumos
    Eclipse: Lumos
    Velos: Lumos # not important
    Elite: Lumos # not important
    OrbitrapTribrid: Lumos
    ThermoTribrid: Lumos
    QE+: QE
    QEHF: QE
    QEHFX: QE
    Exploris: QE
    Exploris480: QE
  predict:
    batch_size_ms2: 512
    batch_size_rt_ccs: 1024
    verbose: True
    multiprocessing: True
The model_mgr section in the yaml defines the common settings for
MS2/RT/CCS prediction.
library
peptdeep library settings_yaml
This command will predict a spectral library for given settings_yaml
file (exported by export-settings). All the
essential settings are in the library section in the settings_yaml
file:
library:
  input:
    infile_type: fasta
    infile_type_choices:
    - fasta
    - sequence_table
    - peptide_table
    - precursor_table
    infiles:
    - xxx.fasta
    fasta:
      protease: '([KR])'
      protease_choices:
      - 'trypsin/P'
      - '([KR])'
      - 'trypsin'
      - '([KR](?=[^P]))'
      - 'lys-c'
      - 'K'
      - 'lys-n'
      - '\w(?=K)'
      - 'chymotrypsin'
      max_miss_cleave: 2
    fix_mods:
    - Carbamidomethyl@C
    var_mods:
    - Acetyl@Protein N-term
    - Oxidation@M
    min_var_mod_num: 0
    max_var_mod_num: 2
    min_precursor_charge: 2
    max_precursor_charge: 4
    min_peptide_len: 7
    max_peptide_len: 35
    min_precursor_mz: 200.0
    max_precursor_mz: 2000.0
    decoy: pseudo_reverse
    decoy_choices:
    - pseudo_reverse
    - diann
    - None
    max_frag_charge: 2
    frag_types:
    - b
    - y
  output_folder: "{PEPTDEEP_HOME}/spec_libs"
  output_tsv:
    enabled: False
    min_fragment_mz: 200
    max_fragment_mz: 2000
    min_relative_intensity: 0.01
    keep_higest_k_peaks: 12
    translate_batch_size: 1000000
    translate_mod_to_unimod_id: False
peptdeep will load sequence data based on library:input:infile_type
and library:input:infiles for library prediction.
library:input:infiles contains the list of files with
library:input:infile_type defined in
library:input:infile_type_choices:
- fasta: Protein fasta files.
- sequence_table: Tab/comma-delimited txt/tsv/csv (text) files which
contain the column
sequence. - peptide_table: Tab/comma-delimited txt/tsv/csv (text) files which
contain the columns
sequence,mods, andmod_sites. peptdeep will not add modifications for this file type. - precursor_table: Tab/comma-delimited txt/tsv/csv (text) files which
contain the columns
sequence,mods,mod_sites, andcharge. peptdeep will not add modifications and charge states for this file type.
Columns of
proteinsandgenesare optional for these txt/tsv/csv files.
For example, a precursor DataFrame looks like this:
import pandas as pd
pd.DataFrame({
    'sequence': ['ACDEFGHIK','LMNPQRSTVK','WYVSTR'],
    'mods': ['Carbamidomethyl@C','Acetyl@Protein N-term;Phospho@S',''],
    'mod_sites': ['2','0;7',''],
    'charge': [2,3,1],
})
.dataframe tbody tr th {
    vertical-align: top;
}

.dataframe thead th {
    text-align: right;
}
| sequence | mods | mod_sites | charge | |
|---|---|---|---|---|
| 0 | ACDEFGHIK | Carbamidomethyl@C | 2 | 2 |
| 1 | LMNPQRSTVK | Acetyl@Protein N-term;Phospho@S | 0;7 | 3 |
| 2 | WYVSTR | 1 |
peptdeep supports multiple files for library prediction, for example (in the yaml file):
library:
  input:
    ...
    infile_type: fasta
    iifiles:
    - /path/to/fasta/human.fasta
    - /path/to/fasta/yeast.fasta
    ...
The library in HDF5 (.hdf) format will be saved into
library:output_folder. If library:output_tsv:enabled is True, a TSV
spectral library that can be processed by DIA-NN and Spectronaut will
also be saved into library:output_folder.
transfer
peptdeep transfer settings_yaml
This command will apply transfer learning to refine RT/CCS/MS2 models
based on model_mgr:transfer:psm_files and
model_mgr:transfer:psm_type. All yaml settings (exported by
export-settings) related to this command are:
model_mgr:
  transfer:
    model_output_folder: "{PEPTDEEP_HOME}/refined_models"
    epoch_ms2: 20
    warmup_epoch_ms2: 10
    batch_size_ms2: 512
    lr_ms2: 0.0001
    epoch_rt_ccs: 40
    warmup_epoch_rt_ccs: 10
    batch_size_rt_ccs: 1024
    lr_rt_ccs: 0.0001
    verbose: False
    grid_nce_search: True
    grid_nce_first: 15.0
    grid_nce_last: 45.0
    grid_nce_step: 3.0
    grid_instrument: ['Lumos']
    psm_type: alphapept
    psm_type_choices:
      - alphapept
      - pfind
      - maxquant
      - diann
      - speclib_tsv
    psm_files: []
    ms_file_type: alphapept_hdf
    ms_file_type_choices:
      - alphapept_hdf
      - thermo_raw
      - mgf
      - mzml
    ms_files: []
    psm_num_to_train_ms2: 100000000
    psm_num_per_mod_to_train_ms2: 50
    psm_num_to_train_rt_ccs: 100000000
    psm_num_per_mod_to_train_rt_ccs: 50
    top_n_mods_to_train: 10
For DDA data, peptdeep can also extract MS2 intensities from the
spectrum files from model_mgr:transfer:ms_files and
model_mgr:transfer:ms_file_type for all PSMs. This will enable the
transfer learning of the MS2 model.
For DIA data, only RT and CCS (if timsTOF) models will be refined.
For example of the settings yaml:
model_mgr:
  transfer:
    ...
    psm_type: pfind
    psm_files:
    - /path/to/pFind.spectra
    - /path/to/other/pFind.spectra

    ms_file_type: thermo_raw
    ms_files:
    - /path/to/raw1.raw
    - /path/to/raw2.raw
    ...
The refined models will be saved in
model_mgr:transfer:model_output_folder. After transfer learning, users
can apply the new models by replacing model_mgr:external_ms2_model,
model_mgr:external_rt_model and model_mgr:external_ccs_model with
the saved ms2.pth, rt.pth and ccs.pth in
model_mgr:transfer:model_output_folder. This is useful to perform
sample-specific library prediction.
rescore
This command will apply Percolator to rescore DDA PSMs in
percolator:input_files:psm_files and
percolator:input_files:psm_type. All yaml settings (exported by
export-settings) related to this command are:
percolator:
  require_model_tuning: True
  raw_num_to_tune: 8

  require_raw_specific_tuning: True
  raw_specific_ms2_tuning: False
  psm_num_per_raw_to_tune: 200
  epoch_per_raw_to_tune: 5

  multiprocessing: True

  top_k_frags_to_calc_spc: 10
  calibrate_frag_mass_error: False
  max_perc_train_sample: 1000000
  min_perc_train_sample: 100

  percolator_backend: sklearn
  percolator_backend_choices:
    - sklearn
    - pytorch
  percolator_model: linear
  percolator_model_choices:
    pytorch_as_backend:
      - linear # not fully tested, performance may be unstable
      - mlp # not implemented yet
    sklearn_as_backend:
      - linear # logistic regression
      - random_forest
  lr_percolator_torch_model: 0.1 # learning rate, only used when percolator_backend==pytorch
  percolator_iter_num: 5 # percolator iteration number
  cv_fold: 1
  fdr: 0.01
  fdr_level: psm
  fdr_level_choices:
    - psm
    - precursor
    - peptide
    - sequence
  use_fdr_for_each_raw: False
  frag_types: ['b_z1','b_z2','y_z1','y_z2']
  input_files:
    psm_type: alphapept
    psm_type_choices:
      - alphapept
      - pfind
      - maxquant
    psm_files: []
    ms_file_type: alphapept_hdf
    ms_file_type_choices:
      - hdf
      - thermo_raw
      - mgf
      - mzml
    ms_files: []
    other_score_column_mapping:
      alphapept: {}
      pfind:
        raw_score: Raw_Score
      msfragger:
        hyperscore: hyperscore
        nextscore: nextscore
      maxquant: {}
  output_folder: "{PEPTDEEP_HOME}/rescore"
Transfer learning will be applied if percolator:require_model_tuning
is True.
The corresponding MS files (percolator:input_files:ms_files and
percolator:input_files:ms_file_type) must be provided to extract
experimental fragment intensities.
install-models
peptdeep install-models --model-file url_or_local_model_zip --overwrite True
Running peptdeep for the first time, it will download and install models
from models on
github
defined in ‘model_url’ in the default yaml settings. This command will
update pretrained_models.zip from
--model-file url_or_local_model_zip.
It is also possible to use other models instead of the pretrained_models
by providing model_mgr:external_ms2_model,
model_mgr:external_rt_model and model_mgr:external_ccs_model.
Python and Jupyter notebooks
Using peptdeep from Python script or notebook provides the most flexible way to access all features in peptdeep.
We will introduce several usages of peptdeep via Python notebook:
global_settings
Most of the default parameters and attributes peptdeep functions and
classes are controlled by peptdeep.settings.global_settings which is a
dict.
from peptdeep.settings import global_settings
The default values of global_settings is defined in
default_settings.yaml.
Pipeline APIs
Pipeline APIs provides the same functionalities with CLI, including library prediction, transfer learning, and rescoring.
from peptdeep.pipeline_api import (
    generate_library,
    transfer_learn,
    rescore,
)
All these functionalities take a settings_dict as the inputs, the dict
structure is the same as the settings yaml file. See the documatation of
generate_library,
transfer_learn,
and
rescore.
ModelManager
from peptdeep.pretrained_models import ModelManager
ModelManager
class is the main entry to access MS2/RT/CCS models. It provides
functionalities to train/refine the models and then use the new models
to predict the data.
Check out tutorial_model_manager.ipynb for details.
Library Prediction
from peptdeep.protein.fasta import PredictFastaSpecLib
PredictFastaSpecLib
class provides functionalities to deal with fasta files or protein
sequences and spectral libraries.
Check out tutorial_speclib_from_fasta.ipynb for details.
DDA Rescoring
from peptdeep.rescore.percolator import Percolator
Percolator
class provides functionalities to rescore DDA PSMs search by pFind and
AlphaPept, (and MaxQuant if output FDR=100%), …
Check out test_percolator.ipynb for details.
HLA Peptide Prediction
from peptdeep.model.model_interface import ModelInterface
import peptdeep.model.generic_property_prediction # model shop
Building new DL models for peptide property prediction is one of the key
features of AlphaPeptDeep. The key functionalities are
ModelInterface
and the pre-designed models and model interfaces in the model shop
(module peptdeep.model.generic_property_prediction).
For example, we can built a HLA classifier that distinguishes HLA peptides from non-HLA peptides, see HLA_peptide_prediction.ipynb for details.
Troubleshooting
In case of issues, check out the following:
-
Issues. Try a few different search terms to find out if a similar problem has been encountered before.
-
Discussions. Check if your problem or feature requests has been discussed before.
Citations
Wen-Feng Zeng, Xie-Xuan Zhou, Sander Willems, Constantin Ammar, Maria Wahle, Isabell Bludau, Eugenia Voytik, Maximillian T. Strauss, Matthias Mann. BioRxiv.
How to contribute
If you like this software, you can give us a star to boost our visibility! All direct contributions are also welcome. Feel free to post a new issue or clone the repository and create a pull request with a new branch. For an even more interactive participation, check out the discussions and the the Contributors License Agreement.
Changelog
See the HISTORY.md for a full overview of the changes made in each version.
Release history Release notifications | RSS feed


Download files
Download the file for your platform. If you're not sure which to choose, learn more about installing packages.


