No project description provided

Project description
Telepythy
Telepythy is a desktop Python shell inspired by DreamPie with some notable additional features, such as remote connections. It is designed to streamline a prototyping workflow.
Features
- Combines the flow of a REPL with the expressiveness of an editor
- UI based on Qt 6
- Syntax highlighting based on Pygments
- Embeddable service with no third-party dependencies
- Remote connections (as client or server via TCP)
- Seamless swapping between multiple interpreter profiles
Requirements
- UI requires Python 3 on Linux/Windows/OSX (tested: 3.6/3.7/3.9 on Linux/Windows)
- Embeddable service supports Python 2 and 3 on all platforms (tested: 2.7/3.6/3.7/3.9 on Linux/Windows)
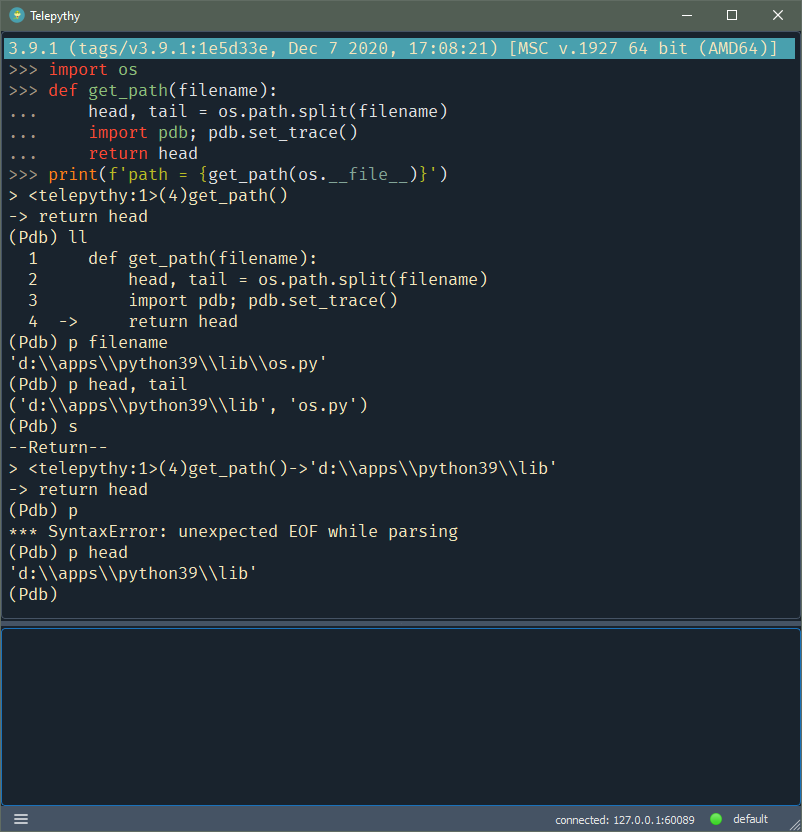
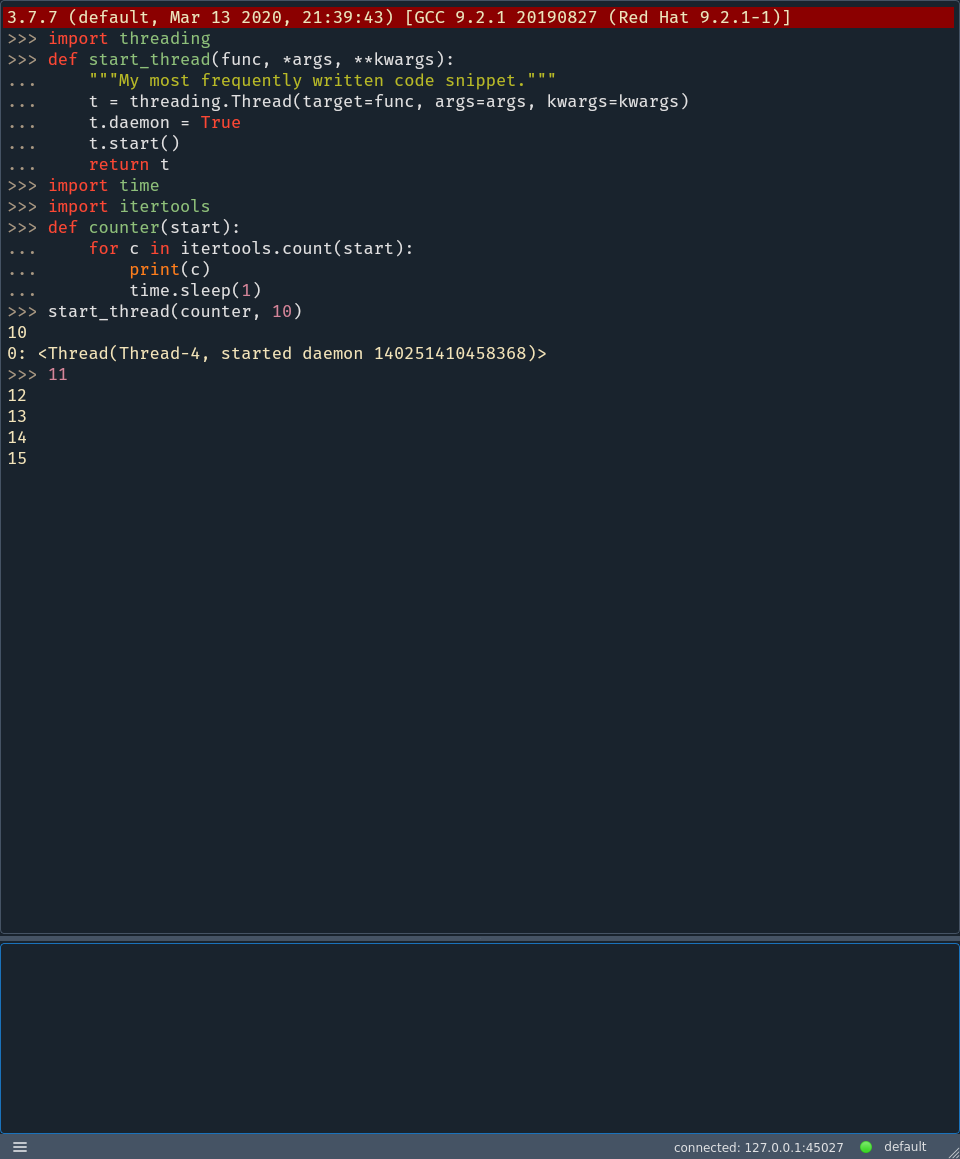
Screenshots
Windows
Motivation
Jupyter exists and is very powerful. But I have always found the interface and workflow awkward. I don't really want a shareable code notebook. I want a prototyping and debugging tool.
As a long-time user of DreamPie, I have grown comfortable with the workflow that it offers, though I have often wished for additional features. Unfortunately, it looks as if all development stopped sometime before 2016, and the last official release was in 2012. I looked into creating a fork to add the features I was interested in, but the effort to modernize (i.e. Python 3) and refactor an unfamiliar and complex code-base was more than I cared to invest in. Starting a new project seemed much more fun.
So, I decided to start from scratch, and Telepythy is the result.
Installation
The recommended way to install telepythy is with pipx:
$ pipx install telepythy
This will install Telepythy in an isolated environment for the current user.
A service-only package, with no dependencies is also available to install into the environment of any project you wish to embed into. This should be installed using regular pip:
$ pip install telepythy-service
Usage
Once Telepythy and its dependencies have been installed, you can start the UI with:
$ telepythy
# or
$ python -m telepythy.gui
NOTE: At this early state, it may be helpful to use the --verbose (-v or -vv) flag to track what Telepythy is doing (especially if reporting a bug).
Configuration
Manually editing the configuration file is currently the only way to persist settings. It is located according to the results of appdirs.user_config_dir() (e.g. ~/.config/telepythy/telepythy.cfg on Linux, C:\Users\<username>\AppData\Local\telepythy\telepythy.cfg on Windows).
Virtual Environments
Any virtual environments discovered in ~/.virtualenvs will be accesible automatically in the Profiles menu.
Embedding
To embed a Telepythy service in your code, you can use any of the following functions:
import telepythy

# start a server thread
telepythy.start_server()

# or start a client thread
telepythy.start_client()

# or start a client/server directly (blocking)
telepythy.client()
telepythy.server()
See the <telepythy>/examples directory from the repository for examples on how to embed the service into existing code.
Local Interpreters
To add a custom local interpreter, you must create a profile referencing the path for the interpreter in the config file:
[profiles]
<profile-name>.command = "<command-for-interpreter>"
Remote Interpreters
The remote service needs to be accessible by whichever interpreter you intend to use. A minimal, service-only package can be installed from PyPI:
$ pip install telepythy-service
It can then be started using one of the following commands:
$ telepythy-service [-c,--connect] '<host>:<port>'
$ telepythy-service [-s,--serve] '<interface>:<port>'
# or
$ python -m telepythy ...
If no arguments are provided, the service will automatically listen as a server on localhost port 7373.
To use Telepythy with a remote service, you must create a profile to either connect to a remote port, or serve on a port, in the config file.
To add a connect profile:
[profiles]
<profile-name>.connect = "<host>:<port>"
To add a serve profile:
[profiles]
<profile-name>.serve = "<interface>:<port>"
You can then use the profile by selecting it in the UI, or with the --profile command-line option:
$ telepythy [-p,--profile] <profile-name>
API
work in progress
Security
There are no security measures in place within Telepythy to secure your source code in transit. The UI controller connects to the embedded service using a regular TCP connection. By default, the UI starts a server listening on localhost and executes a Python process that connects to it. In the future, I may change the default to use UNIX domain sockets on Linux, and named pipes on Windows. However, securing the source code in transit will remain the responsibility of the user.
For connections across machines, I recommend using SSH port forwarding.
Roadmap
Telepythy is very much a work in progress. Here are some features that are planned for future releases (in no particular order):
- Profile configuration UI
- Smart copy/paste
- UNIX domain sockets
- Code snippets
- Session import/export
- Embedded documentation
- Platform installers
- Localization
- Website/logo
If you have additional feature suggestions, please don't hesistate to create an issue. Note that I work on this project in my free time and I don't expect to work on features that I don't personally find useful. I do, however, welcome pull requests.


Download files
Download the file for your platform. If you're not sure which to choose, learn more about installing packages.


