Tool for automatic backups of databases

Project description


A simple service which magically backs up all your databases to all your favorite cloud storage providers, and then notifies you.
Simply create a config file, fill in some connection strings for your favorite
services, and schedule blackbox to run however often you want using something
like cron, or a Kubernetes CronJob.
Table of Contents
Setup
This service can either be set up as a cron job (on UNIX systems), as a Kubernetes CronJob, or scheduled in your favorite alternative scheduler.
Quick start
Requires Python 3.9 or newer
# Install the CLI tool
pip install blackbox-cli

# Create a configuration file
blackbox --init

# Run blackbox with a specific config file
blackbox --config=/path/to/blackbox.yaml
Setting up as a cron job
All you need to do to set it up as a cron job is clone this repo, create a
config file (see below), and trigger blackbox to run automatically however
often you want.
crontab -e

#run backup every hour
0 */1 * * * blackbox --config path/to/blackbox.yml
Setting it up as a Kubernetes CronJob
To set this up as a Kubernetes CronJob, you'll want three manifests and a secret.
Before we start, you'll probably want to create a secret named blackbox-secrets where you expose
environment variables containing stuff like passwords for your databases,
credentials for your storage, and webhooks as environment variables. We'll be
interpolating those into the config file.
Next, we'll need a ConfigMap for the blackbox.yaml config file. See the
Configuration section below for more information on what to put inside this
file.
# blackbox-configmap.yaml
apiVersion: v1
kind: ConfigMap
metadata:
  name: blackbox-config
data:
  blackbox.yaml: |
    databases:
      mongodb:
        main_mongodb:
            connection_string: mongodb://{{ MONGO_INITDB_ROOT_USERNAME }}:{{ MONGO_INITDB_ROOT_PASSWORD }}@mongodb.default.svc.cluster.local:27017

    storage:
      s3:
        main_s3:
          bucket: blackbox
          endpoint: my.s3.com
          aws_access_key_id: {{ AWS_ACCESS_KEY_ID }}
          aws_secret_access_key: {{ AWS_SECRET_ACCESS_KEY }}

    notifiers:
      discord:
        main_discord:
          webhook: {{ DISCORD_WEBHOOK }}

    retention_days: 7
Finally, we need the CronJob itself. This one is configured to run once a day, at midnight.
# cronjob.yaml
apiVersion: batch/v1
kind: CronJob
metadata:
  name: blackbox
spec:
  schedule: "@daily"
  jobTemplate:
    spec:
      template:
        spec:
          containers:
            - name: blackbox
              image: lemonsaurus/blackbox
              imagePullPolicy: Always
              envFrom:
                - secretRef:
                    name: blackbox-secrets
              # Tell blackbox where to find the config file.
              env:
              - name: BLACKBOX_CONFIG_PATH
                value: "/blackbox/config_file/blackbox.yaml"
              volumeMounts:
                # Take care not to mount this in the root folder!
                # That will replace everything in the root folder with
                # the contents of this volume, which sucks.
                - mountPath: /blackbox/config_file
                  name: blackbox-config
          volumes:
            - name: blackbox-config
              configMap:
                name: blackbox-config
          restartPolicy: OnFailure
      backoffLimit: 3
Configuration
blackbox configuration is easy. You simply create a yaml
file, blackbox.yaml, which contains something like this:
See below for specific configuration information for each handler.
databases:
  postgres: # Database type
    main_postgres: # Database identifier
      # Configuration (see below for further information on specific databases)
      username: username
      password: password
      host: host
      port: port

      # Optionally specify storage and notifiers to use
      # You can specify them by type or identifier
      # Use a string for a single specifier, a list for multiple specifiers
      storage_providers:
        - s3
        - secondary_dropbox
      notifiers: slack

  redis:
    main_redis:
      password: password
      host: host
      port: port
      # No specified storage and notifiers, so all storage and notifiers are used

storage:
  s3: # Storage type
    main_s3: # Storage identifier
      bucket: bucket
      endpoint: s3.endpoint.com
    secondary_s3:
      bucket: bucket
      endpoint: s3.another_endpoint.com
  dropbox:
    main_dropbox:
      access_token: XXXXXXXXXXX
    secondary_dropbox:
      access_token: XXXXXXXXXXX

notifiers:
  discord: # Notifier type
    main_discord: # Notifier identifier
      webhook: https://discord.com/api/webhooks/797541821394714674/lzRM9DFggtfHZXGJTz3yE-MrYJ-4O-0AbdQg3uV2x4vFbu7HTHY2Njq8cx8oyMg0T3Wk
  slack:
    main_slack:
      webhook: https://hooks.slack.com/services/XXXXXXXXXXX/XXXXXXXXXXX/XXXXXXXXXXXXXXXXXXX

retention_days: 7
Blackbox will look for this file in the root folder by default, however you can
provide an alternative config file path by creating an environment variable
called BLACKBOX_CONFIG_PATH, and set it to the absolute path of the file.
export BLACKBOX_CONFIG_PATH=/var/my/favorite/fruit/blackbox.yaml
You can also specify the location of this file when using the blackbox cli
command.
blackbox --config=/path/to/blackbox.yaml
Environment Variables
The blackbox.yaml will ✨ magically interpolate ✨ any environment
variables that exist in the environment where blackbox is running. This is
very useful if you want to keep your secrets in environment variables, instead
of keeping them in the config file in plaintext.
Example
Imagine your current config looks like this, but you want to move the username and password into environment variables.
databases:
  postgres:
    main_postgres:
      username: lemonsaurus
      password: security-is-overrated
      host: localhost
      port: 5432
So we'll create two environment variables like these:
export POSTGRES_USERNAME=lemonsaurus
export POSTGRES_PASSWORD=security-is-overrated
And now we can make use of these environment variables by using double curly brackets, like this:
databases:
  postgres:
    main_postgres:
      username: { { POSTGRES_USERNAME } }
      password: { { POSTGRES_PASSWORD } }
      host: localhost
      port: 5432
Databases
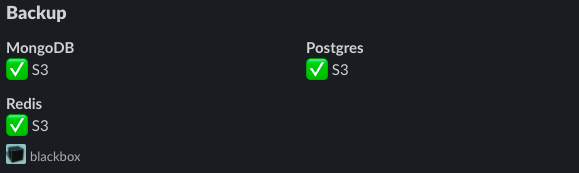
Right now, this app supports MongoDB, PostgreSQL 7.0 or higher, MariaDB, Redis and local storage archiving. If you need support for an additional database, consider opening a pull request to add a new database handler.
To configure databases, add a section with this format:
databases:
  database_type:
    # More than one of each database type can be configured
    identifier_1:
      field: value
    identifier_2:
      field: value
  database_type:
    ...
See below for the specific database types available and fields required. Identifiers can be any string of your choosing.
MongoDB
- Database Type:
mongodb - Required fields:
connection_string - The
connection_stringfield is in the formatmongodb://username:password@host:port - To restore from the backup,
use
mongorestore --gzip --archive=/path/to/backup.archive
  mongodb:
    main_mongo:
      connection_string: "mongodb://blackbox:blackbox@mongo:27017"
PostgreSQL
- Database Type:
postgres - Required fields:
username,password,host,port - To restore from the backup, use
psql -f /path/to/backup.sql
  postgres:
    main_postgres:
      username: blackbox
      password: blackbox
      host: postgres
      port: "5432"
MariaDB
- Database Type:
mariadb - Required fields:
username,password,host,port - To restore from the backup, use
mysql -u <user> -p < db_backup.sql
  mariadb:
    main_mariadb:
      username: root
      password: example
      host: maria
      port: "3306"
MySQL
- Database Type:
mysql - Required fields:
username,password,host,port - To restore from the backup, use
mysql -u <user> -p < db_backup.sql
  mysql:
    main_mysql:
      username: root
      password: example
      host: mysql
      port: "3306"
Redis
- Database Type:
redis - Required fields:
password,host,port
  redis:
    main_redis:
      password: blackbox
      host: redis
      port: "6379"
Local storage
- Database type:
localstorage - Required field:
path - Optional field:
compression_level - The compression level must be an integer between 0 and 9.
- The archive will contain the full structure, starting from the root folder.
  localstorage:
    main_localstorage:
      path: /path/to/folder
      compression_level: 7
To restore from the backup
- Stop Redis server.
- Turn off
appendonlymode in Redis configuration (set tono). - Copy backup file to Redis working directory (
dirin configuration) with name that is defined in configuration keydbfilename. - Set backup permissions.
sudo chown redis:redis <path-to-redis-dump-file>
sudo chmod 660 <path-to-redis-dump-file>
- Start Redis server.
If you want to re-enable appendonly:
- Login with
redis-cli. - Run
BGREWRITEAOF. - Exit from Redis CLI (with
exit). - Stop Redis server.
- Set
appendonlytoyesin Redis configuration. - Start Redis server.
Specify Storage providers and Notifiers for each Database
To specify specific storage providers or notifiers for databases, add the
fields storage_providers and notifiers under each database entry. The entry
can be a list or a string.
databases:
  postgres: # Database type
    main_postgres: # Database identifier
      username: username
      password: password
      host: host
      port: port

      storage_providers:
        - s3
        - secondary_dropbox
      notifiers: slack
The above example will backup main_postgres to every s3 storage provider
configured, as well as the storage provider with the
identifier secondary_dropbox. Then, only the slack notifier gets notified.
These fields are optional. If not given, all storage providers and all notifiers will be used.
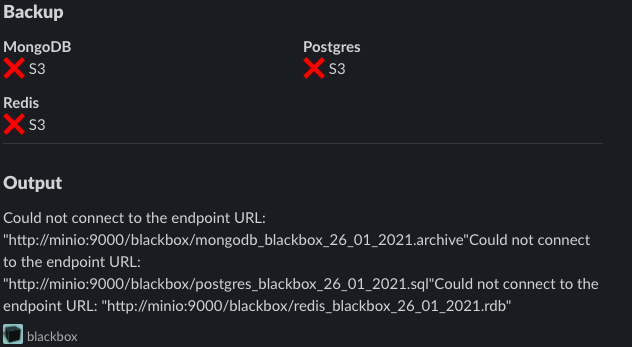
Storage providers
Blackbox can work with different storage providers to save your logs and backups - usually so that you can automatically store them in the cloud. Right now we support S3 and Dropbox.
To configure storage providers, add a section with this format:
storage:
  storage_type:
    # More than one of each storage provider type can be configured
    identifier_1:
      field: value
    identifier_2:
      field: value
  storage_type:
    ...
S3
We support any S3 object storage bucket, whether it's from AWS, Linode , DigitalOcean, Scaleway, or another S3-compatible object storage provider.
Blackbox will respect the retention_days configuration setting and delete
older files from the S3 storage. Please note that if you have a bucket
expiration policy on your storage, blackbox will not do anything to disable
it. So, for example, if your bucket expiration policy is 12 hours and blackbox
is set to 7 retention_days, then your backups are all gonna be deleted after
12 hours unless you disable your policy.
S3 configuration
- Storage Type:
s3 - Required fields:
bucket,endpoint - Optional fields:
aws_access_key_id,aws_secret_access_key - The
endpointfield can look something like this:s3.eu-west-1.amazonaws.com
Credentials
To upload stuff to S3, you'll need credentials. Your AWS credentials can be provided in several ways. This is the order in which blackbox looks for them:
- First, we look for the optional fields in the s3 configuration,
called
aws_access_key_idandaws_secret_access_key. - If these are not found, we'll check if the
AWS_ACCESS_KEY_IDandAWS_SECRET_ACCESS_KEYenvironment variables are declared in the local environment where Blackbox is running. - If we can't find these, we'll look for an
.aws/configfile in the local environment. - NOTE: If the bucket is public, no credentials are necessary.
Dropbox
- Storage Type:
dropbox - Required fields:
access_token - Optional fields:
upload_directory
The Dropbox storage handler needs a user access token in order to work. To get one, do the following:
- Create a Dropbox account (if you don't already have one).
- Go to https://dropbox.com/developers
- Create a new application with App Folder access. Do not give it full access, as this may have dangerous, destructive consequences if configured incorrectly.
You can also define a custom location (root is App Folder) using the
upload_directory optional parameter. This should begin with slash and
must end with slash. Default is root.
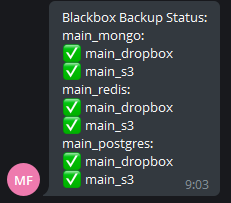
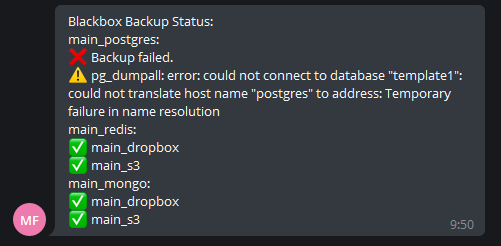
Notifiers
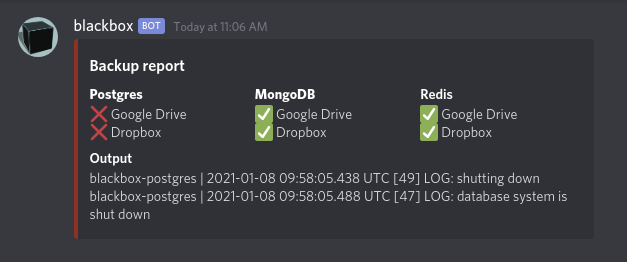
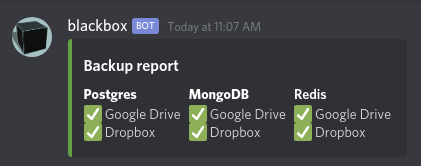
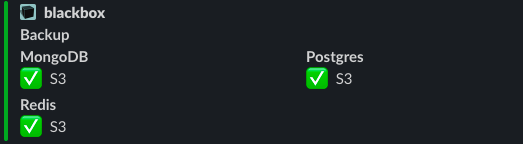
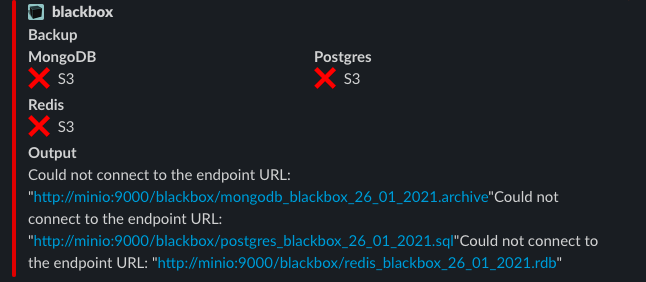
blackbox also implements different notifiers, which is how it reports the
result of one of its jobs to you. Right now we only support Discord and Slack
and Telegram, but if you need a specific notifier, feel free to open an issue.
To configure notifiers, add a section with this format:
notifiers:
  notifier_type:
    # More than one of each notifier type can be configured
    identifier_1:
      field: value
    identifier_2:
      field: value
  notifier_type:
    ...
Discord
- Notifier Type:
discord - Required fields:
webhook - The
webhookfield usually looks likehttps://discord.com/api/webhooks/797541821394714674/lzRM9DFggtfHZXGJTz3yE-MrYJ-4O-0AbdQg3uV2x4vFbu7HTHY2Njq8cx8oyMg0T3Wk - We also support
ptb.discord.comandcanary.discord.comwebhooks.
Slack
- Notifier Type:
slack - Required fields:
webhook - The
webhookfield usually looks likehttps://hooks.slack.com/services/XXXXXXXXXXX/XXXXXXXXXXX/XXXXXXXXXXXXXXXXXXX
Slack notifiers have 2 styles: legacy attachment (default) and modern Block Kit
version. To enable Block Kit version, set the optional field use_block_kit to
anything.
Default:
Modern:
Telegram
- Notifier Type:
telegram - Required fields:
token,chat_id - YAML will look like this:
  telegram:
    telegram_1:
      token: {{ TELEGRAM_TOKEN }}
      chat_id: {{ TELEGRAM_CHAT_ID }}
- You can create a bot and get a bot token using the
BotFatheraccount in Telegram. Follow these instructions. - You can find your
chat_idby using theuserinfobotaccount in Telegram. Just/startthe bot. - Do not forget to
/startyour own bot to grant sending permissions.
Rotation
By default, blackbox will automatically remove all backup files older than 7
days in the folder you configure for your storage provider. To determine if
something is a backup file or not, it will use a regex pattern that corresponds
with the default file it saves, for
example blackbox-postgres-backup-11-12-2020.sql.
You can configure the number of days before rotating by altering
the retention_days parameter in blackbox.yaml.
Cooldown
By default, blackbox will send all notification at every backup attempt.
You can specify a cooldown period in blackbox.yaml during which all notifications will be muted.
This option will not mute failed backups.
Example usage
cooldown: 120s
cooldown: 3 hours
cooldown: 2 days 4 hours
cooldown: 4h 32M 16s
Release history Release notifications | RSS feed


Download files
Download the file for your platform. If you're not sure which to choose, learn more about installing packages.
Source Distribution
Built Distribution
Hashes for blackbox_cli-2.4.0-py3-none-any.whl
| Algorithm | Hash digest | |
|---|---|---|
| SHA256 | a4292ded8f646af483927ad03596d1277cdf5ae5714b71eb004affa1717bf534 |
|
| MD5 | 2846b55fbac28a290f7b60eb84414259 |
|
| BLAKE2b-256 | 3fdcb71760a412d94b1bc57e3fa39b1ab2aa592a5c97278fd8fccf987f7bf68c |


