A Python toolkit for cross-framework abstraction of quantum programs.


Project description


The qBraid-SDK is a Python toolkit for cross-framework abstraction, transpilation, and execution of quantum programs.

Features
- Unified quantum frontend interface. Transpile quantum circuits between supported packages. Leverage the capabilities of multiple frontends through simple, consistent protocols.
- Build once, target many. Create quantum programs using your preferred circuit-building package, and execute on any backend that interfaces with a supported frontend.
- Benchmark, compare, interpret results. Built-in compatible post-processing enables comparing results between runs and across backends.
Installation & Setup

For the best experience, install the qBraid-SDK environment on lab.qbraid.com. Login (or create an account) and follow the steps to install an environment.
Using the SDK on qBraid Lab means direct, pre-configured access to all Amazon Braket supported devices with no additional access keys or API tokens required. See qBraid Quantum Jobs for more.
Local install
The qBraid-SDK, and all of its dependencies, can also be installed using pip:
pip install qbraid
If using locally, follow linked instructions to configure your qBraid, AWS, and IBMQ credentials.
Documentation & Tutorials
qBraid documentation is available at docs.qbraid.com.
See also:
Quickstart
Transpiler
Construct a quantum program of any supported program type,
>>> from qbraid import QPROGRAM_LIBS
>>> QPROGRAM_LIBS
['braket', 'cirq', 'qiskit', 'pyquil', 'pytket', 'qasm2', 'qasm3']
and use the circuit_wrapper() to convert to any other supported program type:
>>> from qbraid import circuit_wrapper
>>> from qbraid.interface import random_circuit
>>> qiskit_circuit = random_circuit("qiskit")
>>> cirq_circuit = circuit_wrapper(qiskit_circuit).transpile("cirq")
>>> print(qiskit_circuit)
          ┌────────────┐
q_0: ──■──┤ Rx(3.0353) ├
     ┌─┴─┐└───┬────┬───┘
q_1: ┤ H ├────┤ √X ├────
     └───┘    └────┘
>>> print(cirq_circuit)
0: ───@───Rx(0.966π)───
      │
1: ───H───X^0.5────────
Devices & Jobs
Search for quantum backend(s) on which to execute your program.
>>> from qbraid import get_devices
>>> get_devices()
Device status updated 0 minutes ago

Device ID                           Status
---------                           ------
aws_oqc_lucy                        ONLINE
aws_rigetti_aspen_m2                OFFLINE
aws_rigetti_aspen_m3                ONLINE
ibm_q_perth                         ONLINE
...
Apply the device_wrapper(), and send quantum jobs to any supported backend,
from any supported program type:
>>> from qbraid import device_wrapper, get_jobs
>>> aws_device = device_wrapper("aws_oqc_lucy")
>>> ibm_device = device_wrapper("ibm_q_perth")
>>> aws_job = aws_device.run(qiskit_circuit, shots=1000)
>>> ibm_job = ibm_device.run(cirq_circuit, shots=1000)
>>> get_jobs()
Displaying 2 most recent jobs:

Job ID                                              Submitted                  Status
------                                              ---------                  ------
aws_oqc_lucy-exampleuser-qjob-zzzzzzz...            2023-05-21T21:13:47.220Z   QUEUED
ibm_q_perth-exampleuser-qjob-xxxxxxx...             2023-05-21T21:13:48.220Z   RUNNING
...
Compare results in a consistent, unified format:
>>> aws_result = aws_job.result()
>>> ibm_result = ibm_job.result()
>>> aws_result.measurement_counts()
{'00': 483, '01': 14, '10': 486, '11': 17}
>>> ibm_result.measurement_counts()
{'00': 496, '01': 12, '10': 479, '11': 13}
Local account setup
To use the qBraid-SDK locally (outside of qBraid Lab), you must add your account credentials:
-
Create a qBraid account or log in to your existing account by visiting account.qbraid.com
-
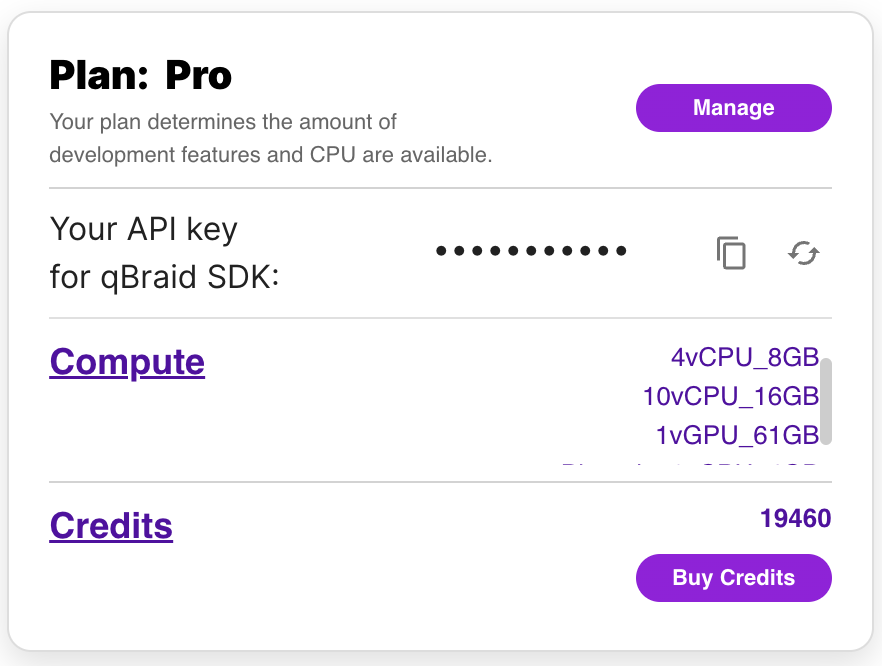
Copy your API Key token from the left side of your account page:
-
Save your API key from step 2 by calling
QbraidSession.save_config():
from qbraid.api import QbraidSession

session = QbraidSession(api_key='API_KEY')
session.save_config()
The command above stores your credentials locally in a configuration file ~/.qbraid/qbraidrc,
where ~ corresponds to your home ($HOME) directory. Once saved, you can then connect to the
qBraid API and leverage functions such as get_devices() and get_jobs().
Load Account from Environment Variables
Alternatively, the qBraid-SDK can discover credentials from environment variables:
export JUPYTERHUB_USER='USER_EMAIL'
export QBRAID_API_KEY='QBRAID_API_KEY'
Then instantiate the session without any arguments
from qbraid.api import QbraidSession

session = QbraidSession()
Launch on qBraid
The "Launch on qBraid" button (below) can be added to any public GitHub
repository. Clicking on it automaically opens qBraid Lab, and performs a
git clone of the project repo into your account's home directory. Copy the
code below, and replace YOUR-USERNAME and YOUR-REPOSITORY with your GitHub
info.
Use the badge in your project's README.md:
[<img src="https://qbraid-static.s3.amazonaws.com/logos/Launch_on_qBraid_white.png" width="150">](https://account.qbraid.com?gitHubUrl=https://github.com/YOUR-USERNAME/YOUR-REPOSITORY.git)
Use the badge in your project's README.rst:
.. image:: https://qbraid-static.s3.amazonaws.com/logos/Launch_on_qBraid_white.png
    :target: https://account.qbraid.com?gitHubUrl=https://github.com/YOUR-USERNAME/YOUR-REPOSITORY.git
    :width: 150px
Contributing
-
Interested in contributing code, or making a PR? See CONTRIBUTING.md
-
For feature requests and bug reports: Submit an issue
-
For discussions, and specific questions about the qBraid SDK, qBraid Lab, or other topics, join our discord community
-
For questions that are more suited for a forum, post to Quantum Computing Stack Exchange with the
qbraidtag. -
Want your open-source project featured as its own runtime environment on qBraid Lab? Fill out our New Environment Request Form
License
Release history Release notifications | RSS feed


Download files
Download the file for your platform. If you're not sure which to choose, learn more about installing packages.
Source Distribution
Built Distribution
Hashes for qbraid-0.4.4.dev20230816194153.tar.gz
| Algorithm | Hash digest | |
|---|---|---|
| SHA256 | f8f994bbce66a1130fb8896fdc310254a9393cd8de3b3e2d687a207f2df1d628 |
|
| MD5 | bb648c9c65698d6c53c613f2ff49550b |
|
| BLAKE2b-256 | e5b7e7f121fc1b134d42688a1e798cd8640905954f35ae39f34913bd70dea0f2 |
Hashes for qbraid-0.4.4.dev20230816194153-py3-none-any.whl
| Algorithm | Hash digest | |
|---|---|---|
| SHA256 | beafb0a6c42c0a81fccca7a573c959762b305f1f633c9a95d53d40f264c4a2cd |
|
| MD5 | c92663f2d1c0ea84096f4ef436d786e0 |
|
| BLAKE2b-256 | 8052f448bff02fc9979b35bb623e29a315723226011557c80e83e238b5fb9680 |


